DISCLAIMER: The modifications described in the following text are for educational purposes only. In no way do I recommend that you apply these modifications to your own motorcycle. If you do choose to go ahead and modify your motorcycle based on the information in this document you will accept all responsibility for your own actions. The author(s) of this document, and host(s) providing it for you, accept no responsibility whatsoever. If you are unqualified to make any of the changes described herein but are bent on doing the modification, seek out a knowledgeable friend or professional mechanic for assistance.
Fitting a new timing chain (cam chain) to a Yamaha TTR250
Over time the cam chain on TTR250s will wear or stretch.
They are relatively cheap to buy and easy to fit.
As usual when going inside the engine it is essential
that you have the workshop manual to hand for full details of the procedures,
torque settings, etc.
This pictorial guide is just to help you along the way. The work was done on a TTR that I have just refurbished and was exhibiting some cam chain noise.
Tools needed:- a socket set, torque wrench and hex-sockets.
Parts/supplies: new timing chain Yamaha part # 94591-43122 (see here) plus maybe a new clutch cover gasket on standby just in case the original gets damaged.
Doing the job.
Remove the seat, petrol tank and exhaust header pipe.
Wash the area above the engine and around the clutch cover. You do not want mud and grit falling into your precious engine when the covers are off!
Set engine to TDC (the single timing mark NOT the double one!).
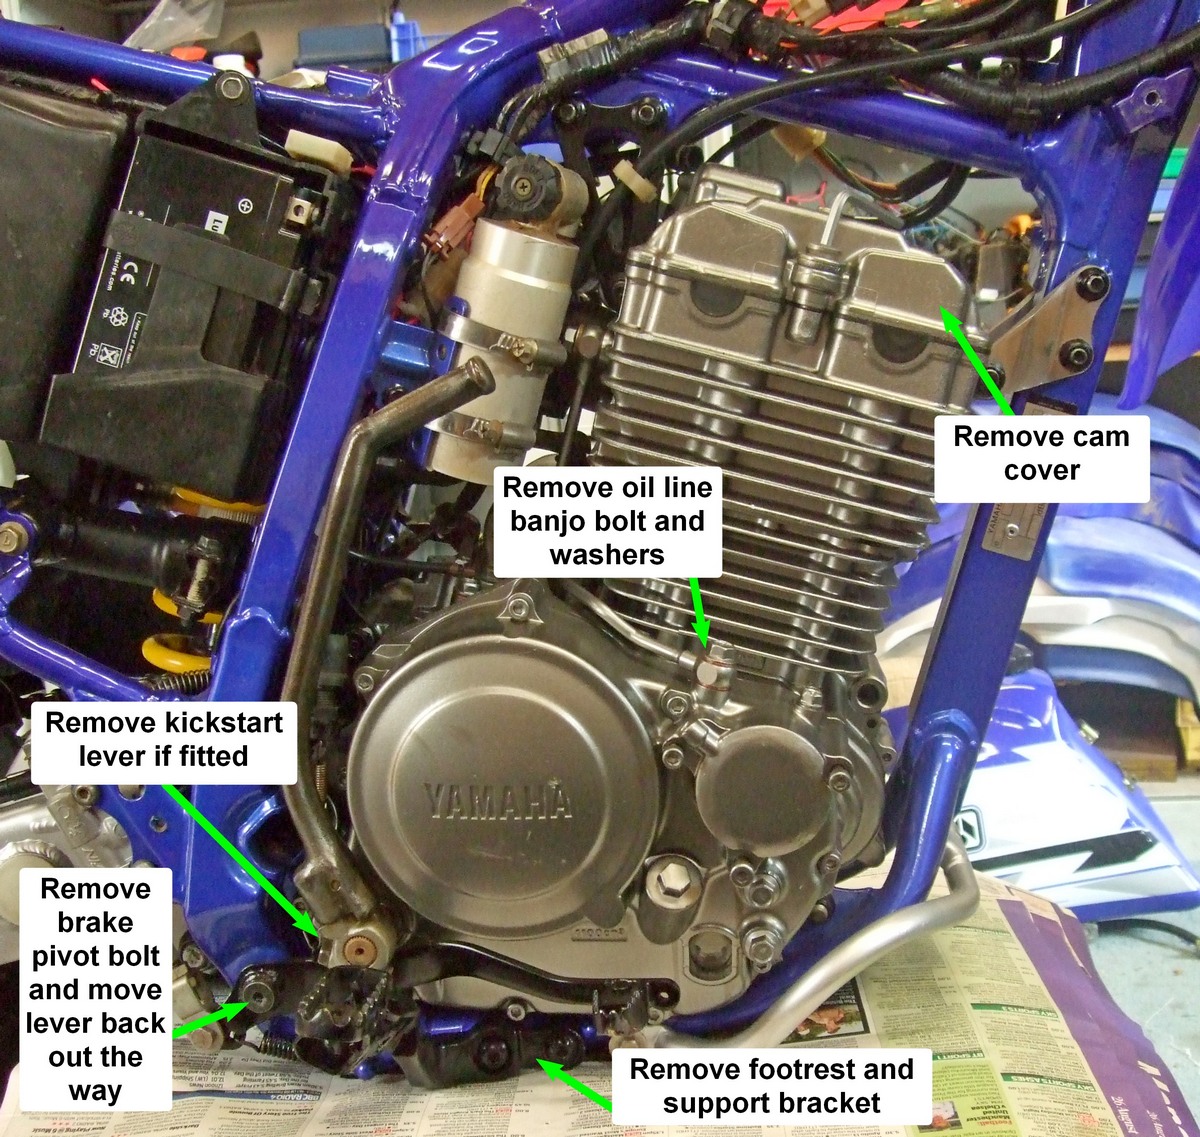
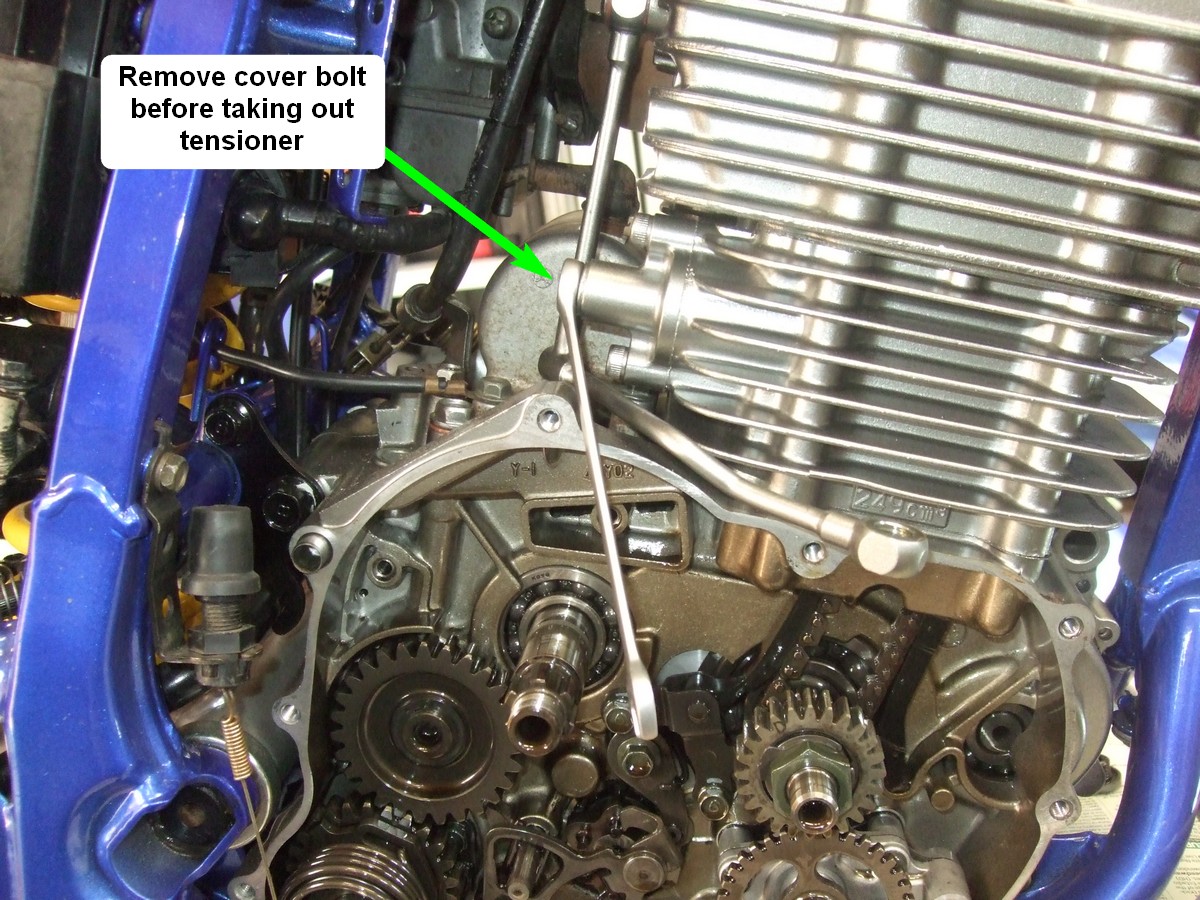
Remove footpeg and support bracket, brake pedal pivot bolt, oil pipe banjo bolt and washers, cam cover and kickstart lever as shown in the photo below:
Make sure your working area is clean. I tend to rob the recycling bin of old newspapers and lay them around to give a clean absorbent surface on which to put down any parts removed. You are definitely going to lose a little oil when you take off the clutch cover.
Undo the shock reservoir Jubilee clips and move it out of the way.
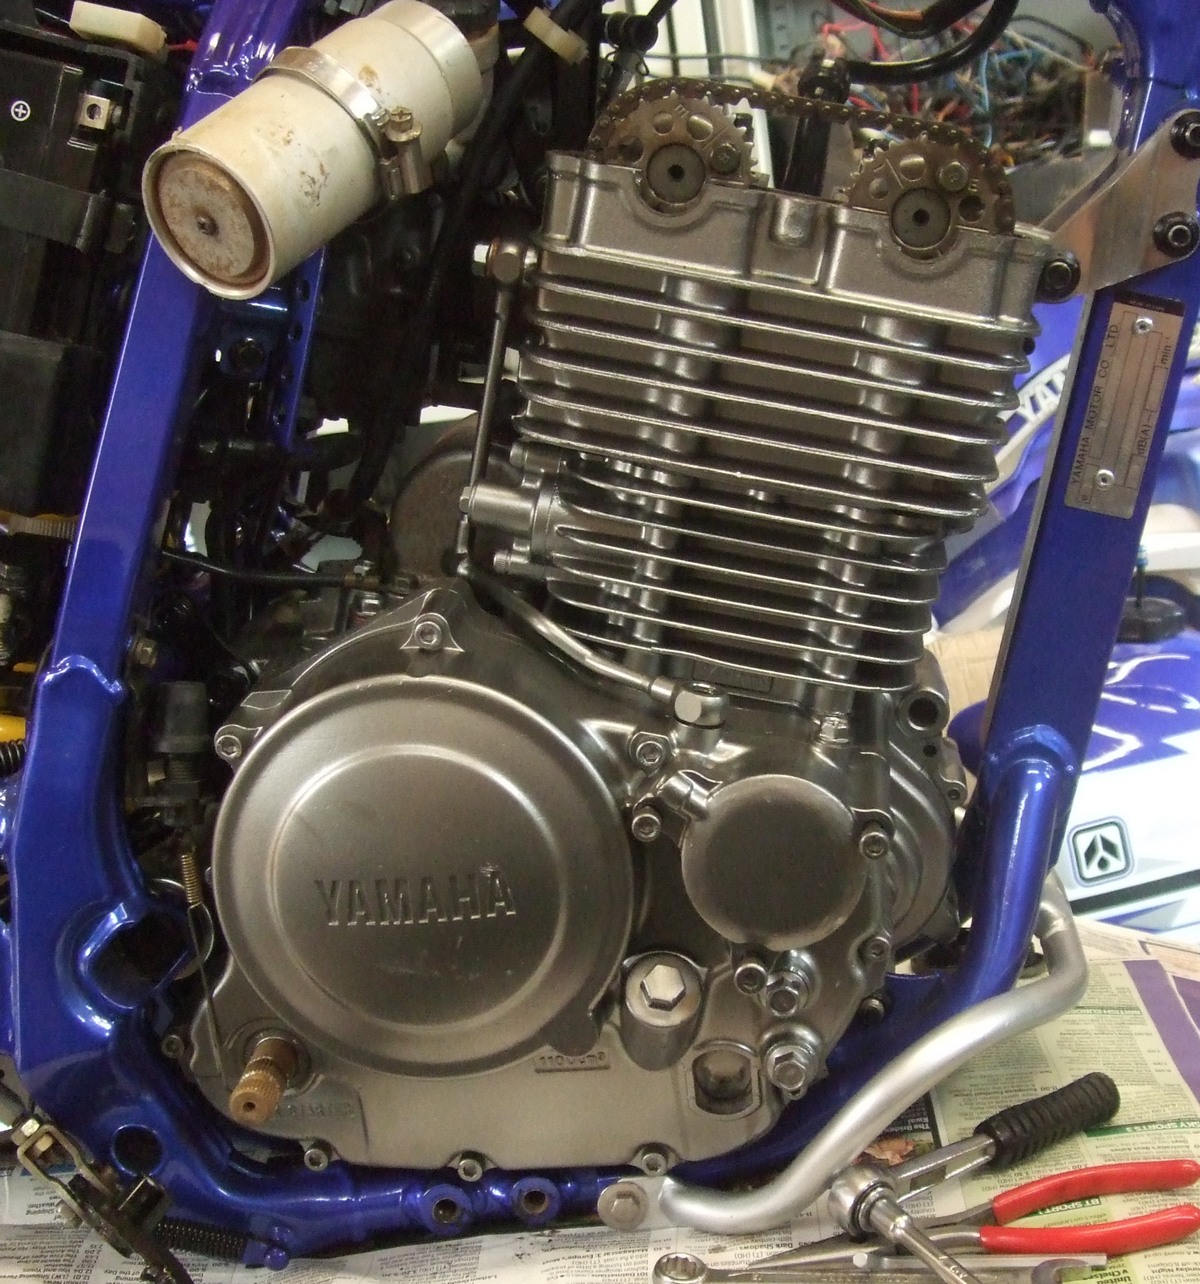
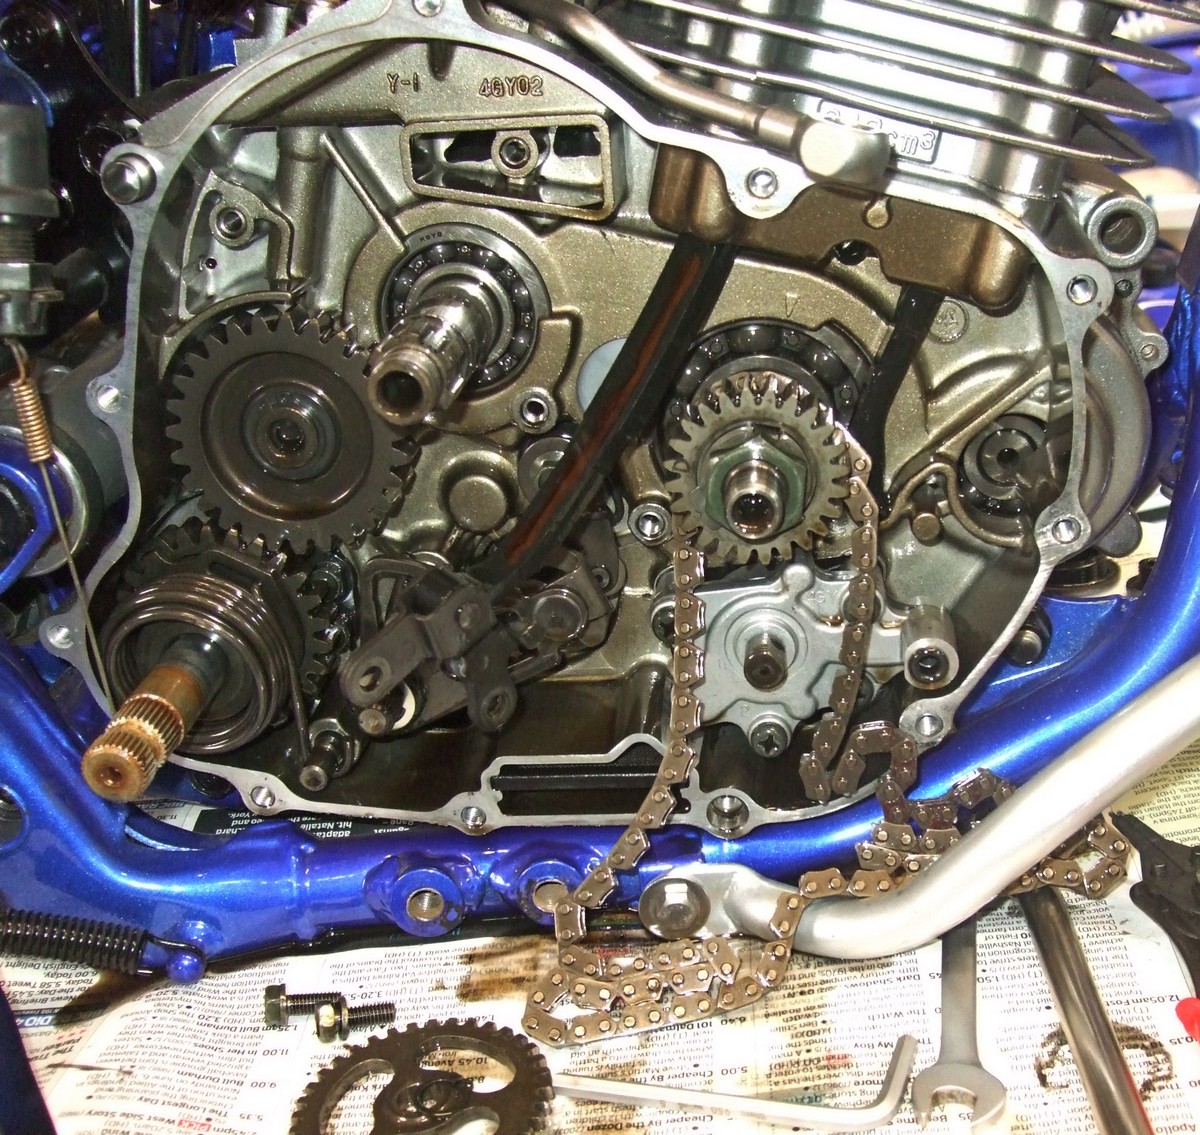
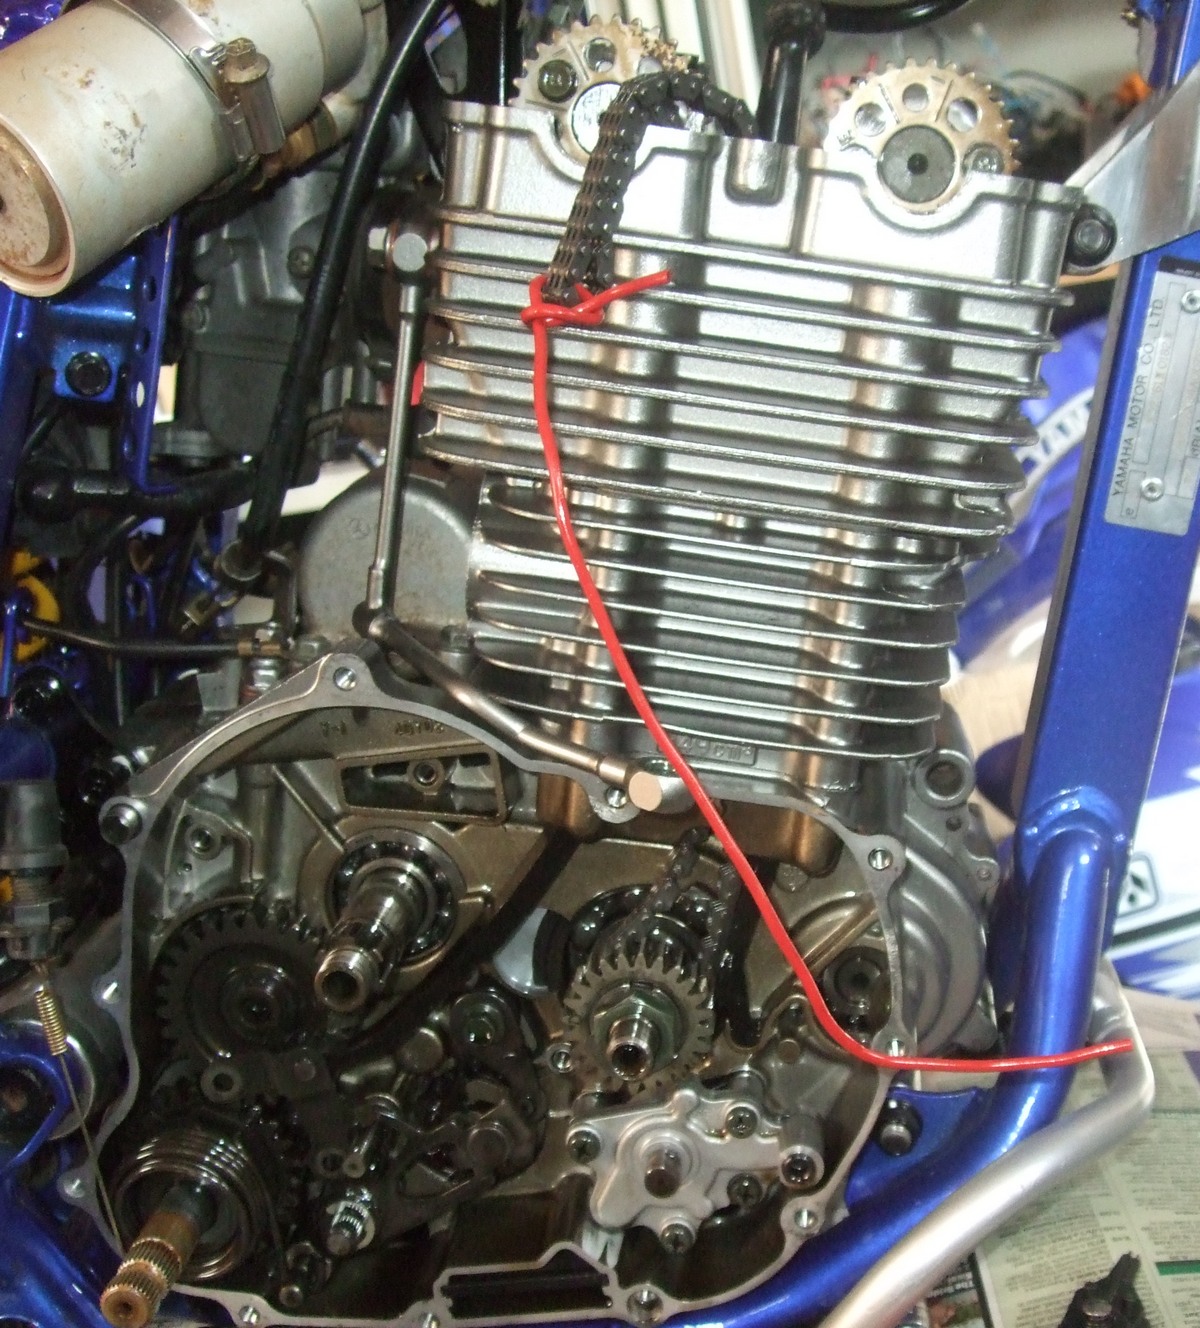
Your engine should then look a bit like this.
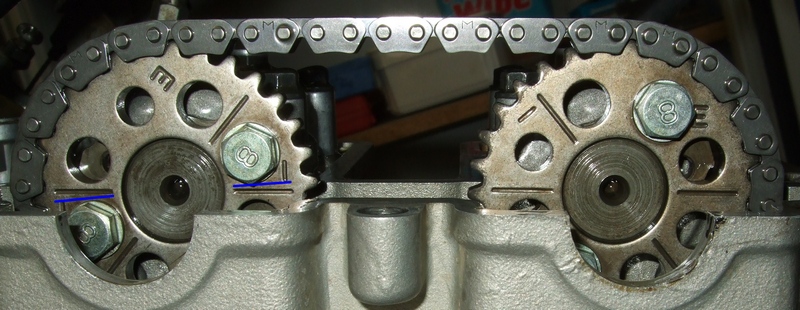
The indicator that the chain was slightly worn was that timing mark line on the left-hand sprocket wasn't parallel with the head. Not a long way out but enough to make it worthwhile for me to change the chain. See photo below:
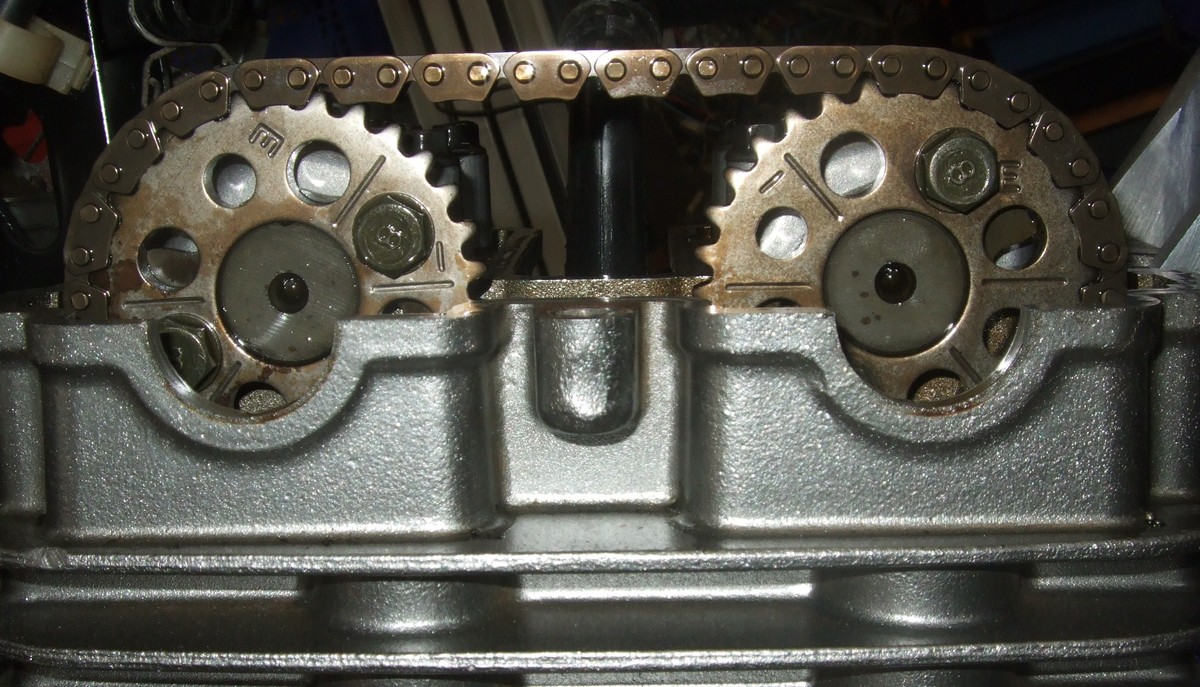
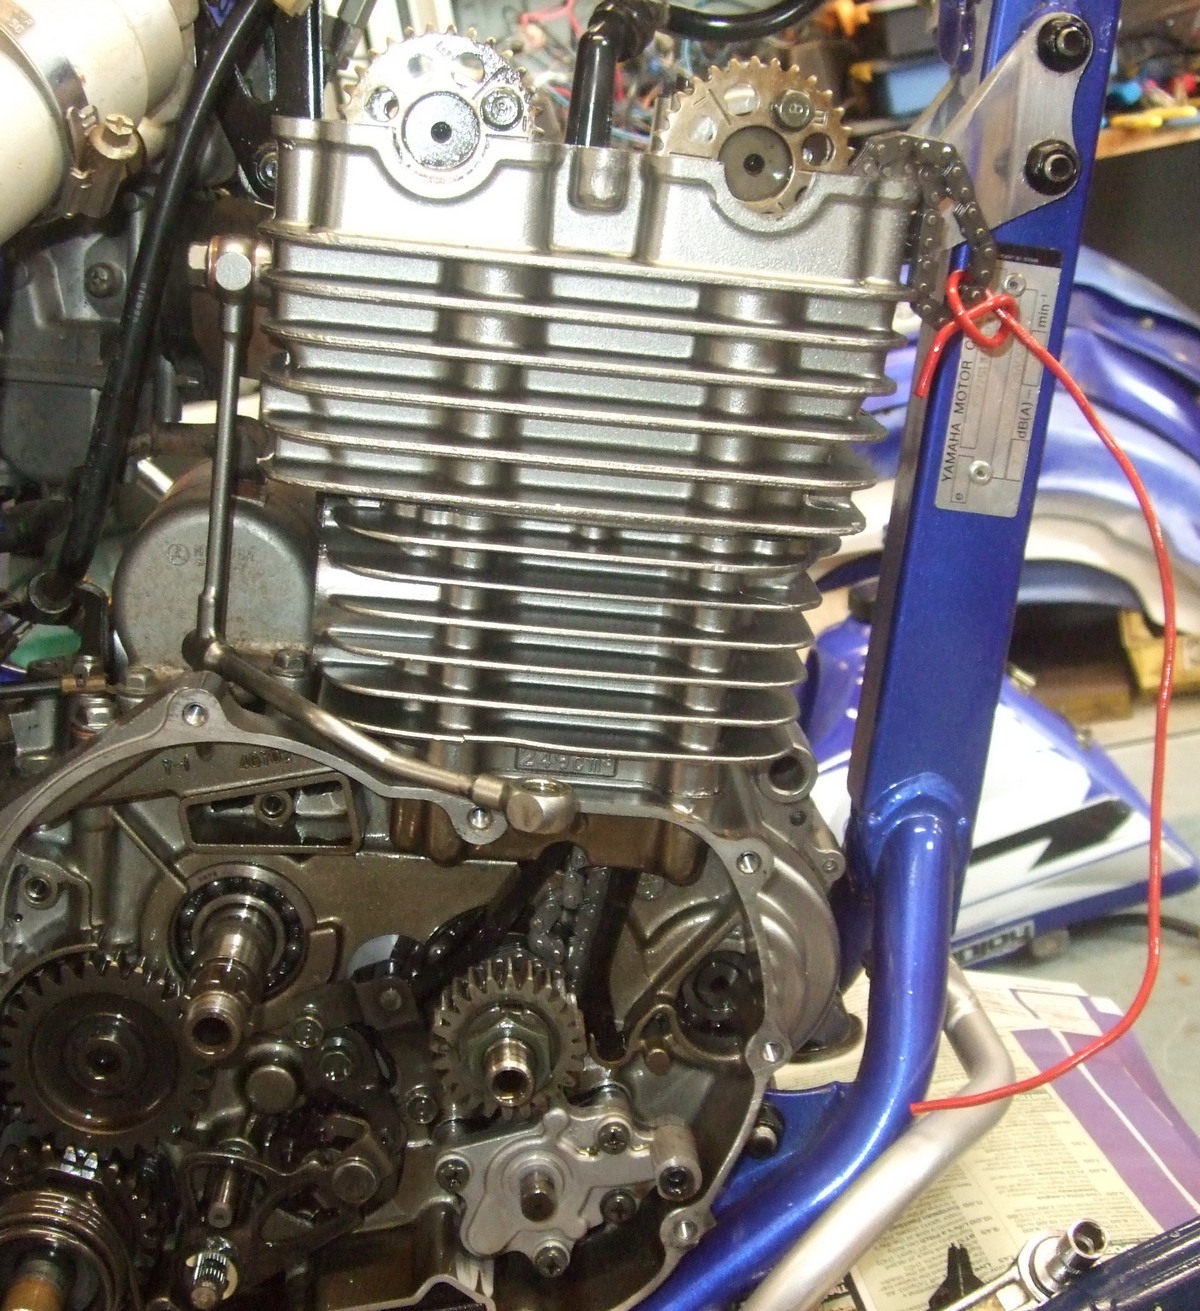
Ideally the timing lines on the cam sprockets should be parallel with the head casting as shown in the photo below. The blue lines indicate how the lines appear when the chain is worn
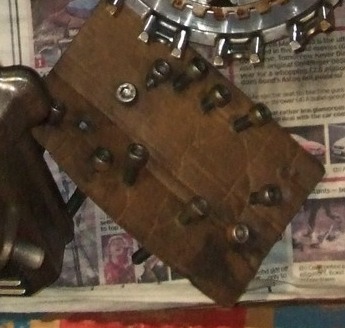
Remove the casing bolts and keep them safely in order as they come out as they are different lengths. I mark up a bit of cardboard and punch holes to put the bolts in.
Remove the cover carefully to keep its gasket intact.
Next job is to remove the clutch cover bolts and springs gradually and evenly and remove the plates. Try and keep them in order.
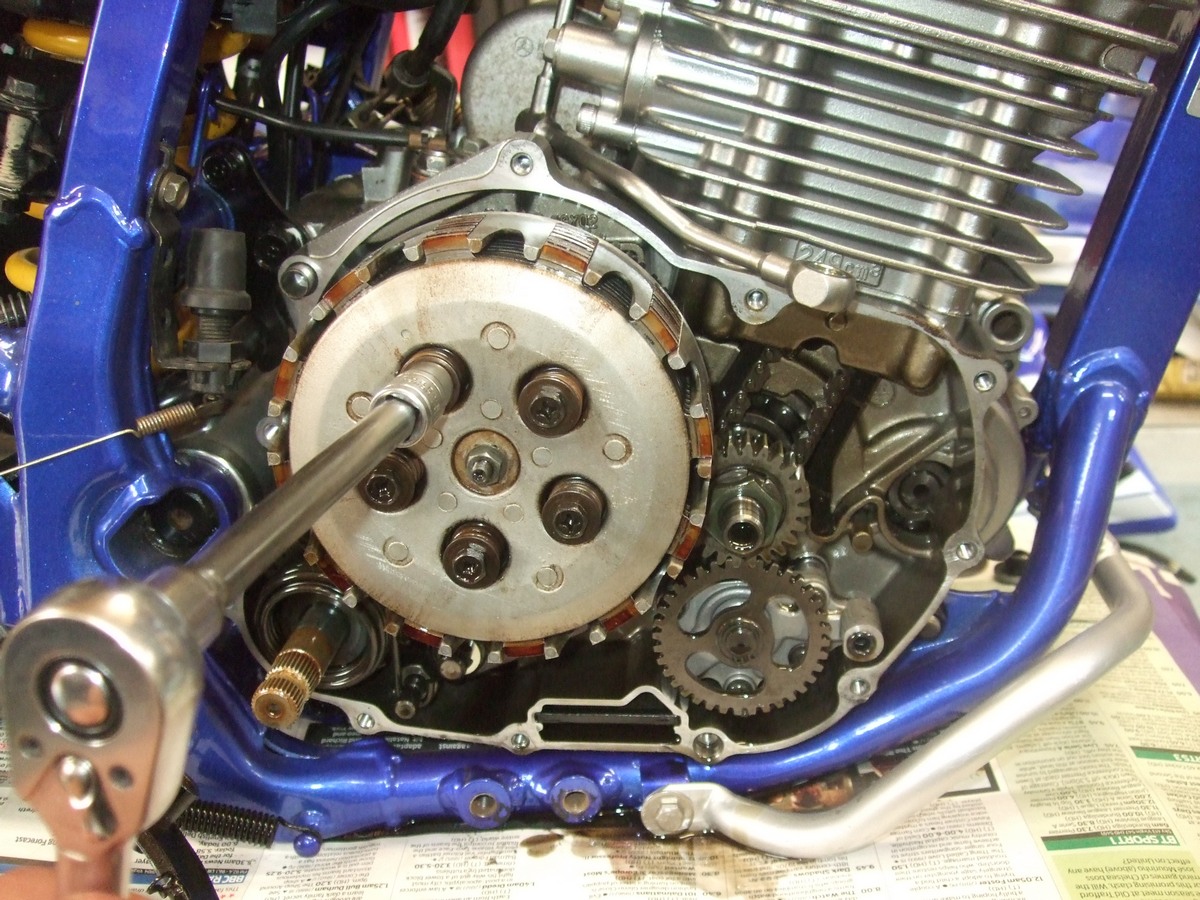
Knock back the tab washer flat and, using whatever form of clutch holder or gear jammer you have, remove the clutch basket retaining nut (27mm). I use this tool.
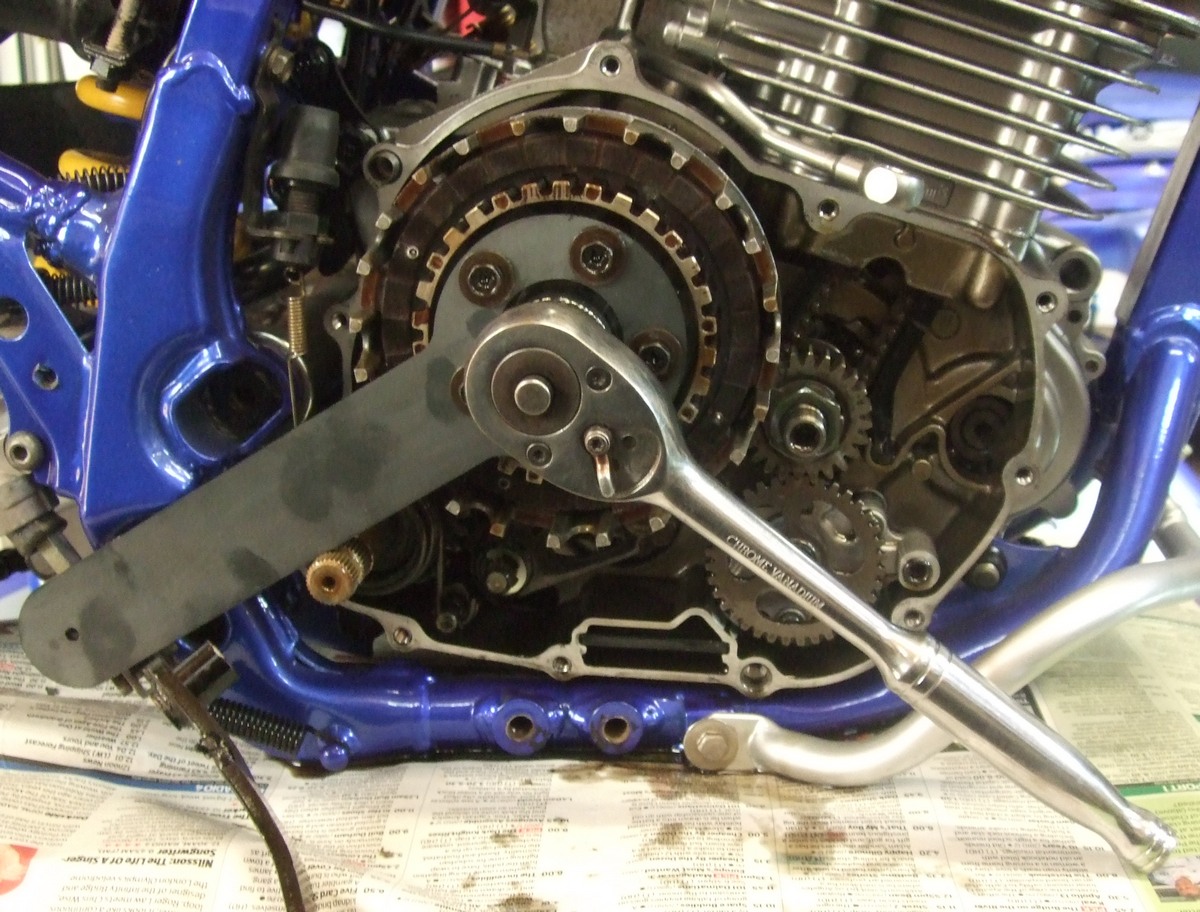
The internal basket can sometimes stick but you can easily put the tool back on to give something to pull against.

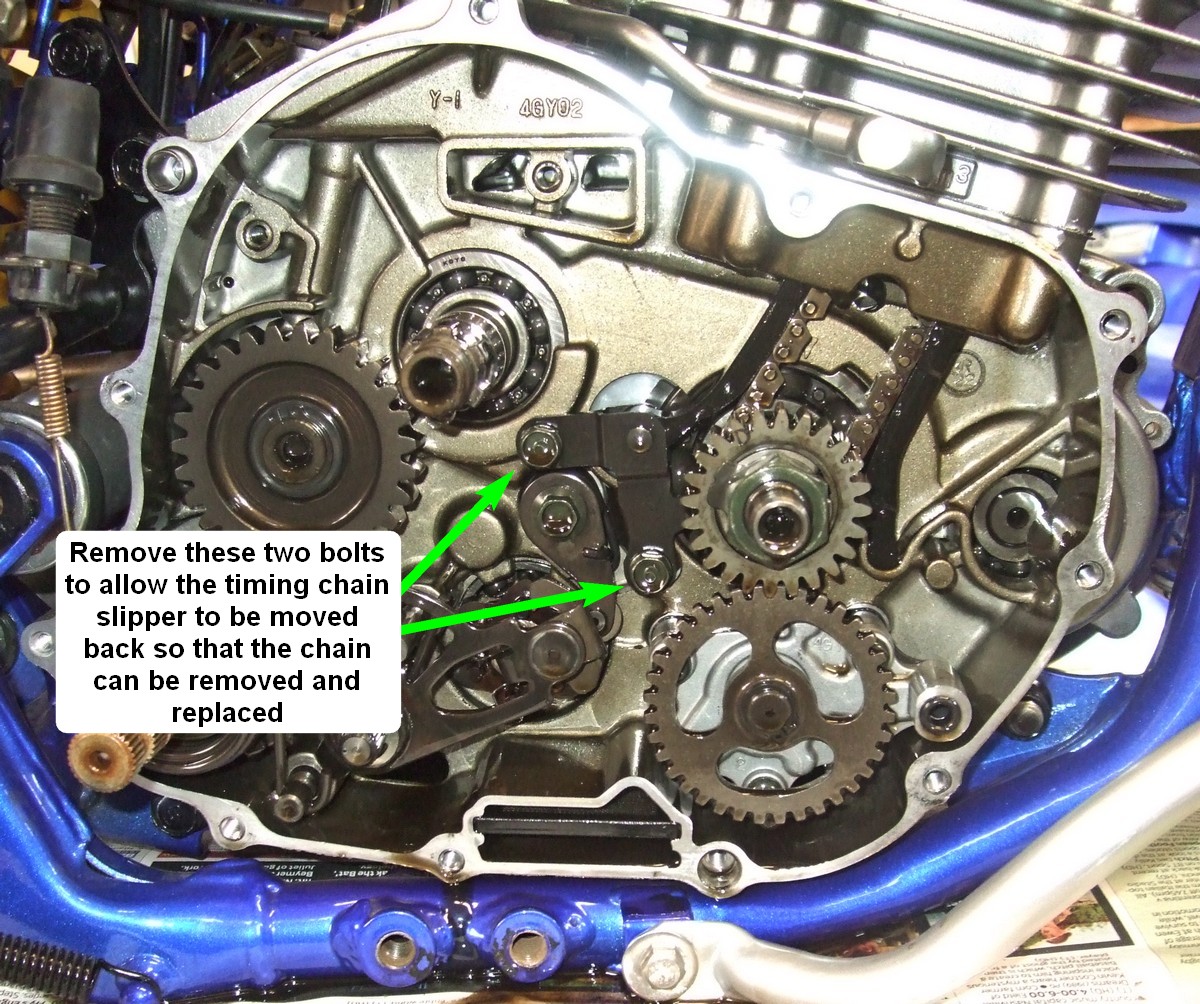
You are now able to remove the timing chain slipper retaining bolts to give access to the chain:
I recommend loosening the sealing bolt before removing the tensioner as it can be tight and difficult to get off afterwards.
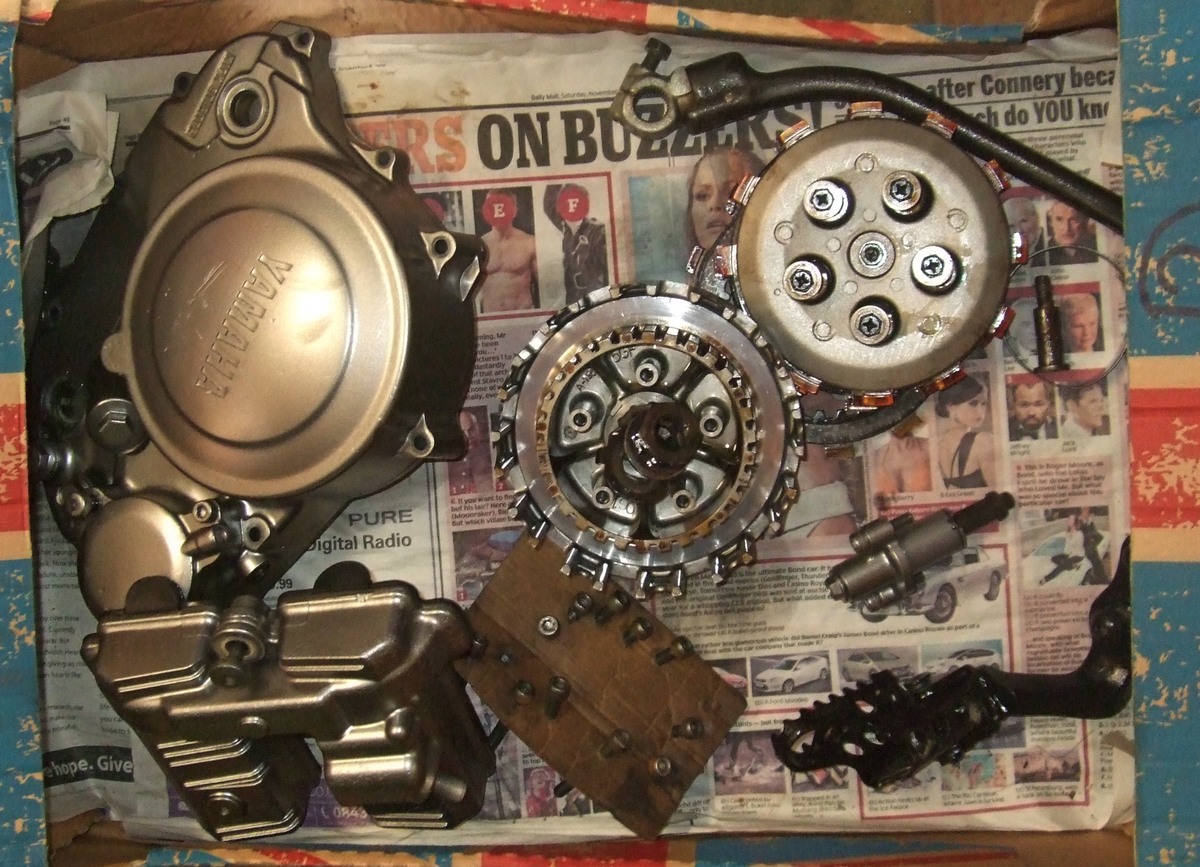
Remove the circlip holding the oil pump drive gear on and remove the gear.
Your parts box should now look a bit like this:
Lift the old chain off the sprockets and drop it down through and remove it.
It is then easy to wiggle out the slipper to check it for wear and any possible damage. On rare occasions they can crack around the point that the tensioner pin pushes against it.
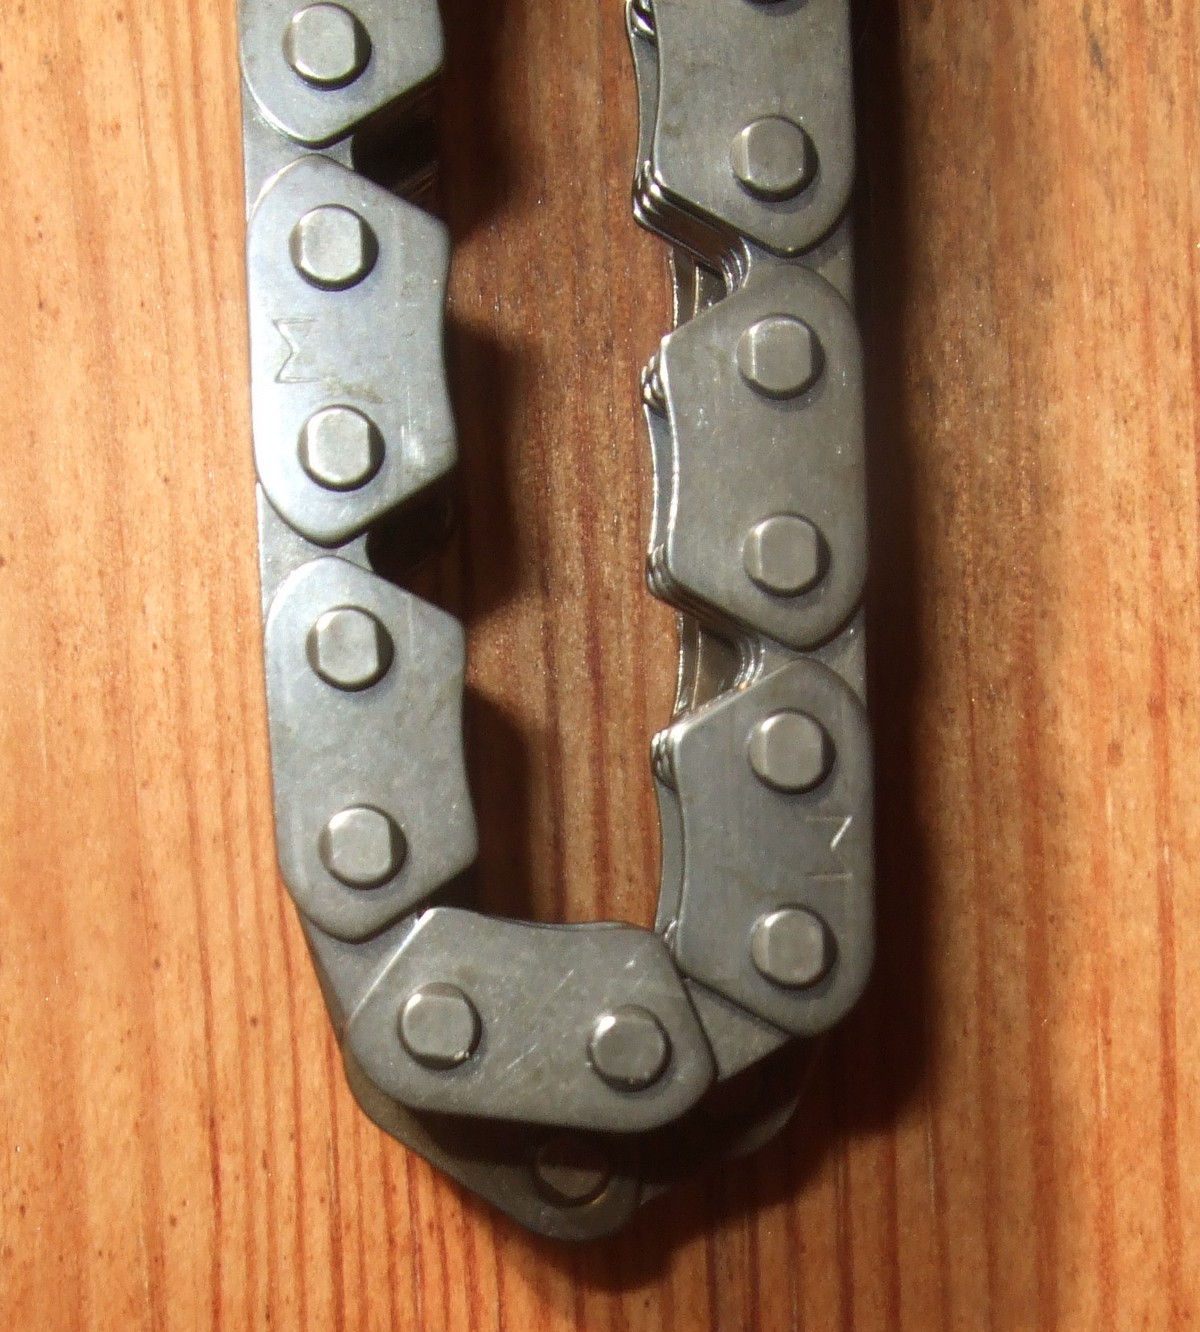
A simple check of the old chain is to hook it over the round part of a screwdriver blade alongside the new chain and, if it has stretched, it will be obvious. My old chain wasn't too bad but still worth replacing having got this far! See photo below:
Hook the new chain over its bottom sprocket and pull it up to the top of the cylinder head using a bit of plastic-sheathed wire or string,
Bolt the slipper back on:
At this stage it is worth checking your valve clearances and adjusting if necessary as, to fit the new chain over the top sprockets, you may need to take off the caps from the rear (inlet) camshaft and tip it forward to allow the chain to be seated on the sprockets and get everything lined up properly. See here for a "how to" guide. If you are lucky, the chain can be fitted without disturbing the camshafts!
At this stage double check that the crankshaft hasn't moved and the timing mark is properly aligned so that the engine is at TDC.
Refitting the timing chain tensioner:
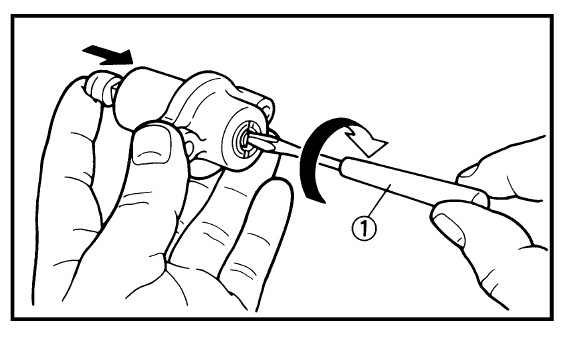
The workshop manual shows how to wind in the tensioner before
fitting. The tensioner rod is spring loaded so, whilst pressing the tensioner
rod inward, lightly wind the the tensioner rod up fully with clockwise turns of
a thin screwdriver.
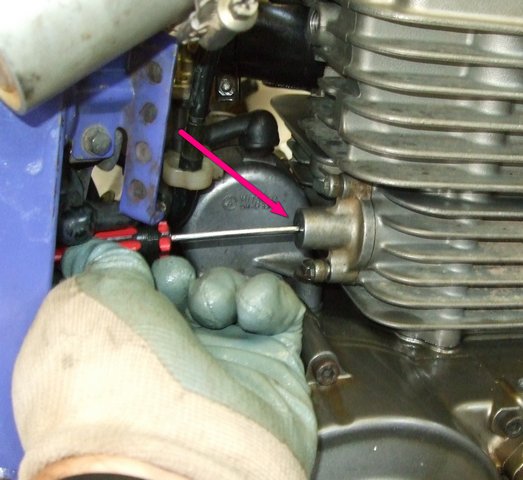
This can be tricky! I never seem to have a screwdriver short enough to make replacing the tensioner an easy job and, since taking the photo above, a mate (ttrsteve) made me one up out of a spare IKEA flatpack hex key and kindly donated it to me after we had finished using it on his engine.
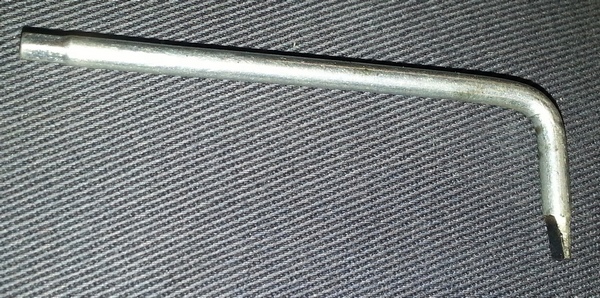
What is nice about it is that it sticks in the slot leaving two hands free.
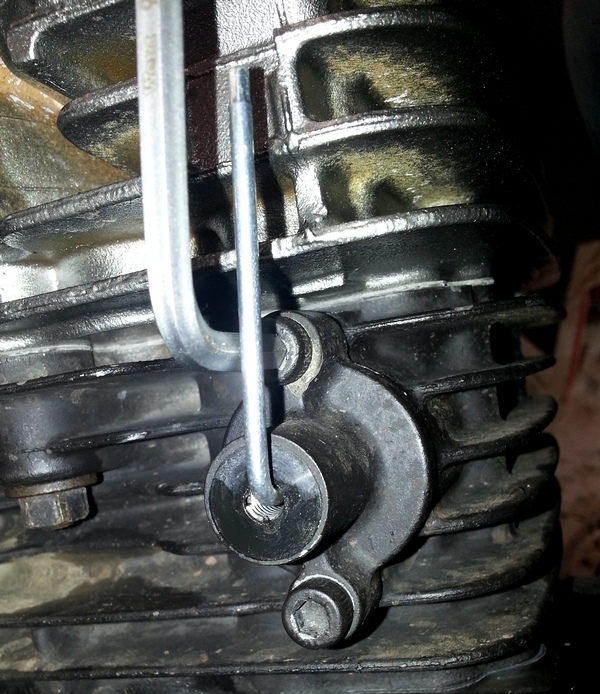
So, to repeat, use the best tool you have to turn the tensioner head inside the bolt hole which will pull the spring-loaded tensioner rod into the body of the tensioner. Hold the screwdriver in place whilst replacing the tensioner and the 2 bolts to hold it in place, and then gently release the screwdriver allowing the plunger to extend. There should no longer be any slack in the cam chain.
Before refitting the clutch cover, roll the engine forward at least 2 more full revolutions, using a socket on the flywheel bolt to make sure nothing is binding and everything has gone back together properly, then check the cam timing again. Better to find out now that it's moved, rather than when it's all back together!
The engine should turn over smoothly with no binding or clunks. It is important to do this test before using the starter motor as that has enough force to bend valves etc if there is a problem.
It is then a case of putting everything back on in reverse order.
Job done!
Brian Sussex
Compiled by Brian Sussex, Devon, UK with help from brother Trev!
http://www.totallyttrs.com/
- everything you need (possibly!) for
your TTR250
http://www.ttr250.com/
- all you ever wanted to know
about TTR250s
http://ttr250.activeboard.com/
- the forum for TTR250 owners
http://www.totallywrs.com/
-
for all your WR250R and WR250X after-market parts and accessories
Reference within this site to any specific commercial or non-commercial product, process, or service by trade name, trademark, manufacturer, private individual or otherwise does not constitute or imply an endorsement, recommendation, or favour by Brian Sussex or Totally TTRs