
As usual when going inside the engine it is essential that you have the workshop manual to hand for full details of the procedures, torque settings, etc.
DISCLAIMER: The modifications described in the following text are for educational purposes only. In no way do I recommend that you apply these modifications to your own motorcycle. If you do choose to go ahead and modify your motorcycle based on the information in this document you will accept all responsibility for your own actions. The author(s) of this document, and host(s) providing it for you, accept no responsibility whatsoever. If you are unqualified to make any of the changes described herein but are bent on doing the modification, seek out a knowledgeable friend or professional mechanic for assistance.
Retrofitting a kickstart to a Yamaha TTR250
The blue TTRs in the UK are all dual start with electric and kick starters. Some of the white TTRs came with a kickstart fitted, presumably an optional extra when new or a kickstart kit (expensive!) fitted in later life.
Kickstart kits are no longer available from Yamaha but the individual parts are. However, the cost of the parts to make up the whole assembly is over £675 at UK prices including VAT.
Please note that all non-kickstart TTRs have the machinings and provision to retrofit a kickstart.
There are quite a few TTRs now being broken for spares and
it is possible to obtain the kickstart mechanism from one of these and retrofit
it. Easy to do and takes about 90 minutes. These are the parts you need:
As usual when going inside the engine it is essential
that you have the workshop manual to hand for full details of the procedures,
torque settings, etc.
This pictorial guide is just to help you along the way. The work was done on my brother Trev's white Open Enduro using second-hand kickstart mechanism from a TTR engine I had broken for spare parts.
Tools needed:- a socket set, torque wrench and hex-sockets.
Parts/supplies: second-hand kickstart mechanism plus kickstart spring retaining pin (part number 55V1566800) and new oil seal (part number 93102-17263 size 25x17x4) plus maybe a new clutch cover gasket on standby just in case the original gets damaged.
Before you start, make sure that the petrol tap is turned off and the petrol cap doesn't leak, Otherwise just remove the petrol tank. Lean the TTR over onto a firm surface such as a bike stand or wooden box and make sure it is secured safely. It should then be comfortable to work on the clutch side of the engine where the kickstart will be fitted.
Make sure the floor and working area is clean. I tend to rob the recycling bin of old newspapers and lay them around to give a clean absorbent surface on which to put down any parts removed. You are definitely going to lose a little oil.
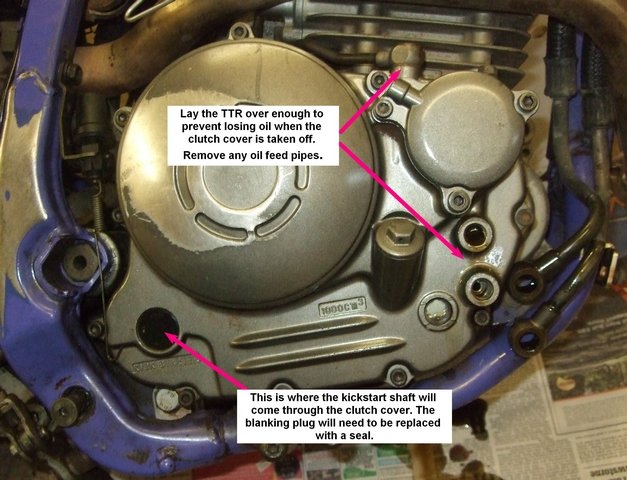
First step is to remove the brake pedal and footpeg to make access easier. Then
loosen the exhaust system to allow access to remove the oil feed banjo bolt at
the top of the casing. Remove the casing bolts and keep them safely in order as
they come out as they are different lengths. Remove the cover carefully to keep
its gasket intact.
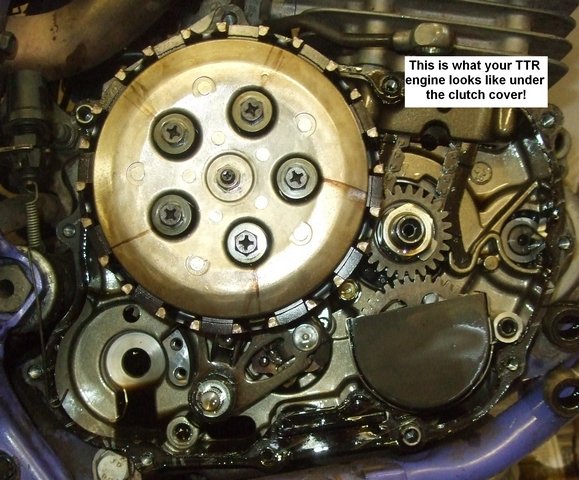
Remove the clutch basket.
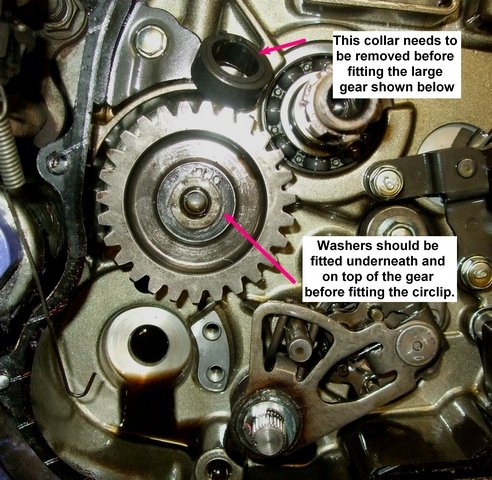
You can now start to fit the kickstart mechanism starting with the intermediate
gear that links the kickstart with the clutch.
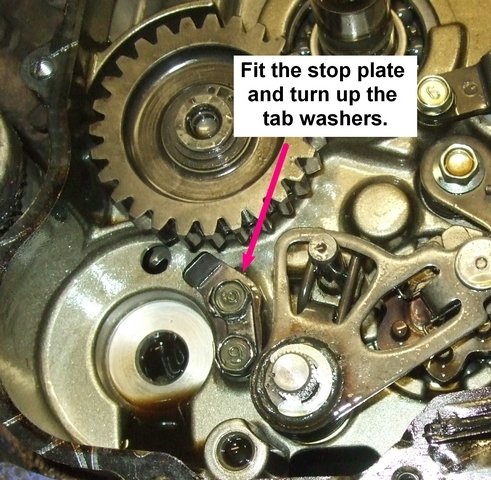
Fit the stop plate as shown above.
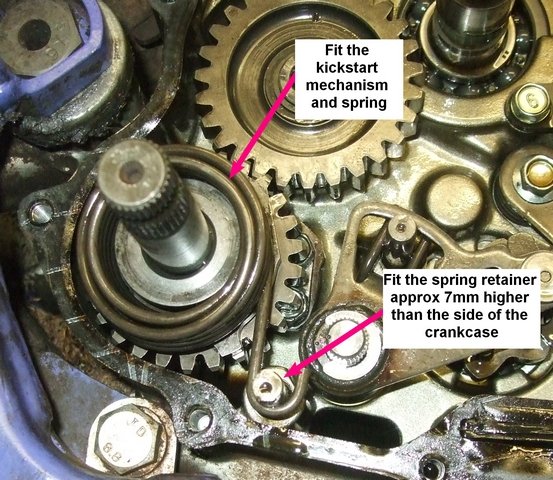
The kickstart mechanism pops right in. You may need to pop the kickstart lever
on the shaft to help give the spring a bit of preload.
Now fit the small steel splined shaft
that retains the kickstart spring. DON'T KNOCK IT ALL THE WAY IN! See below:
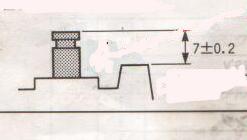
It must
protrude about 7mm above the side of the crankcase as shown above.
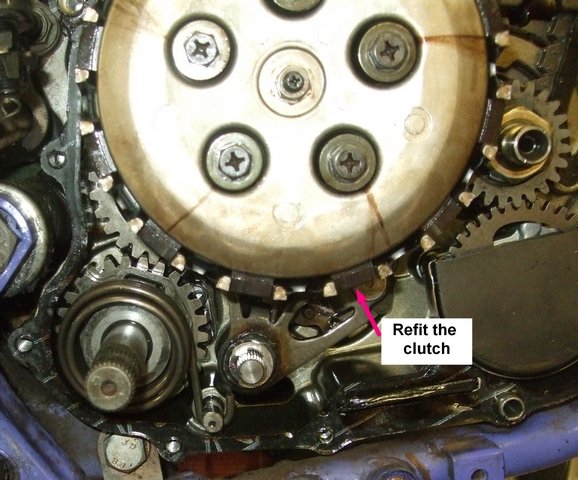
Refit the clutch.
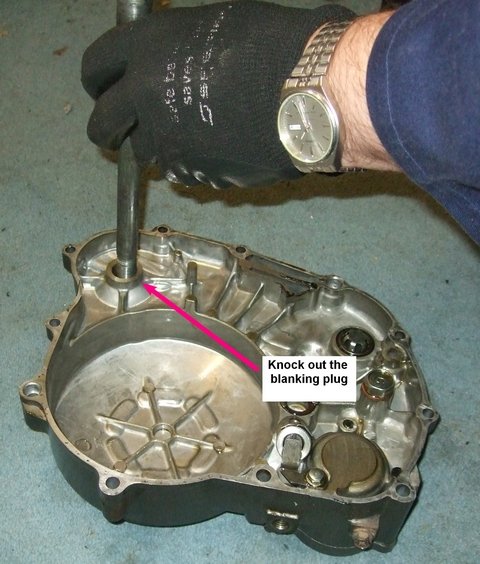
The original casing has a blanking plug where the kickstart shaft will go
through so knock it out.
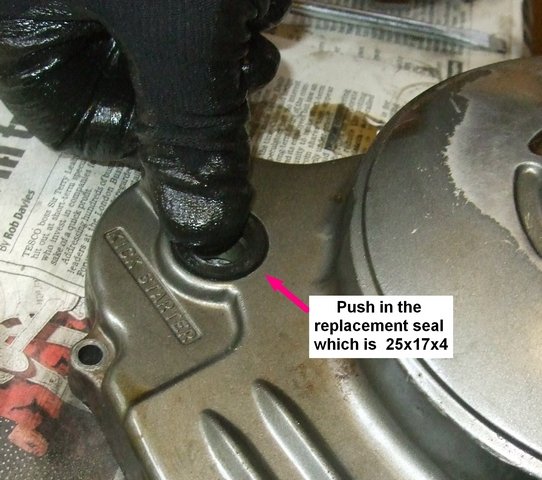
Clean the orifice, oil the seal and pop it in.
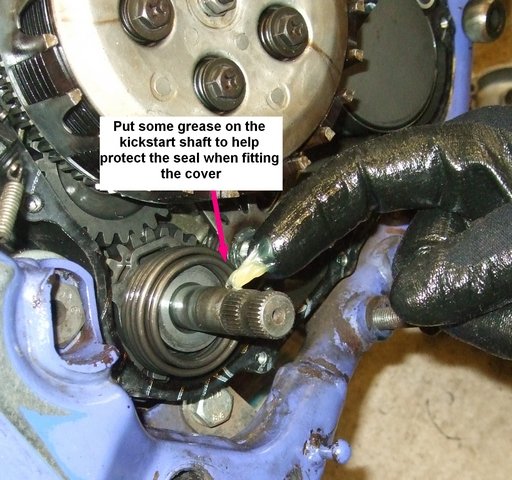
Grease the kickstart shaft to help ease on the cover and protect the seal lips.
Tighten the cover bolts to 10Nm.

Your engine should start to look like this.
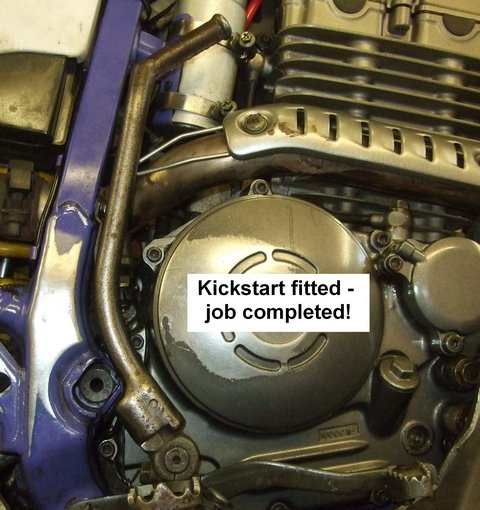
Fit the kickstart itself lining it up as above. Refit the brake pedal, footpeg
and exhaust system.
Get your TTR upright and check it all works. Ours did and the TTR started second kick ;-)
Job done!
ADDENDUM:
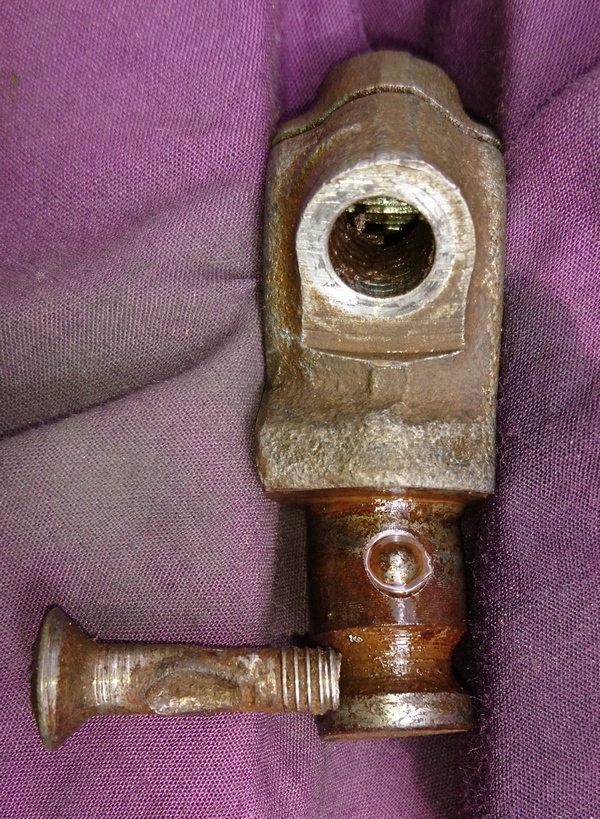
If your kickstart is a bit wobbly then you may need a new ball bearing and spring - although the spring rarely needs replacement.
To access them you need to remove the cross-headed screw as shown below. Be careful as the ball bearing sits on a spring and it may "eject"!
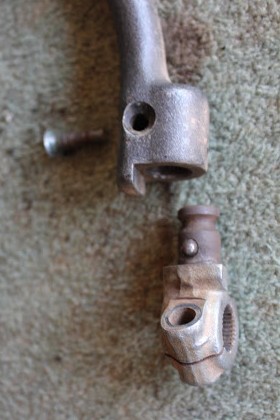
If the screw is worn (as in the example shown in the photo below) then new ones are available from Yamaha spares. It's described as "SCREW CROSS RECESS" and has part number 9015106005.
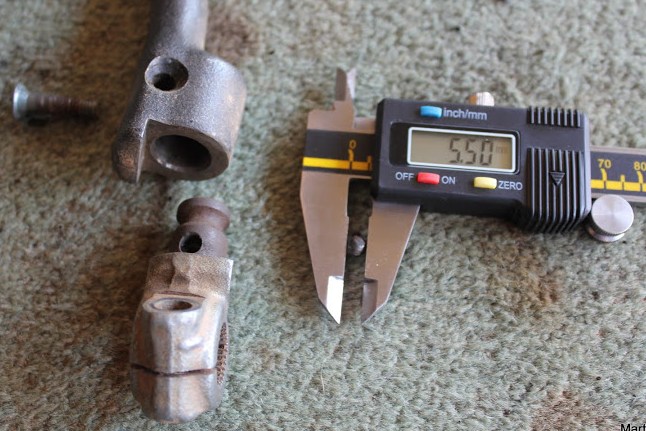
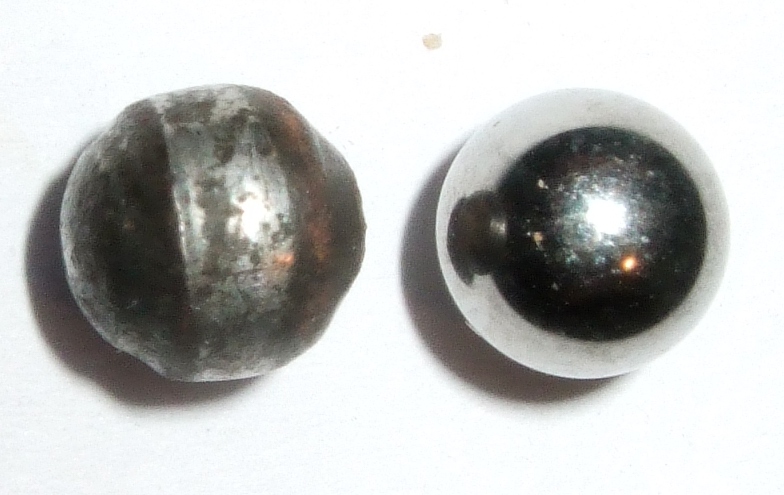
The ball bearing is 5.5mm in diameter and should be replaced if no longer spherical. Most bearing suppliers stock them.
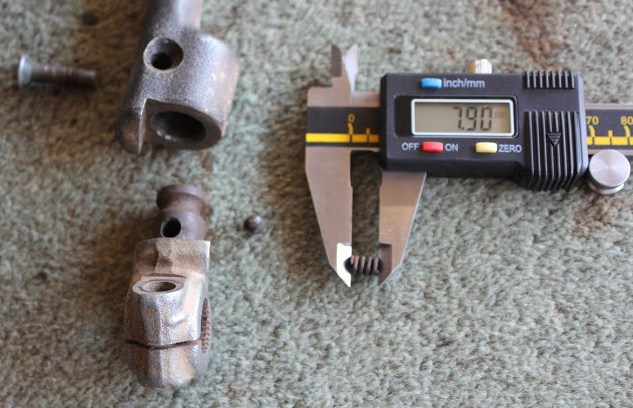
The spring is 7.9mm long but doesn't usually get compressed but worth checking.
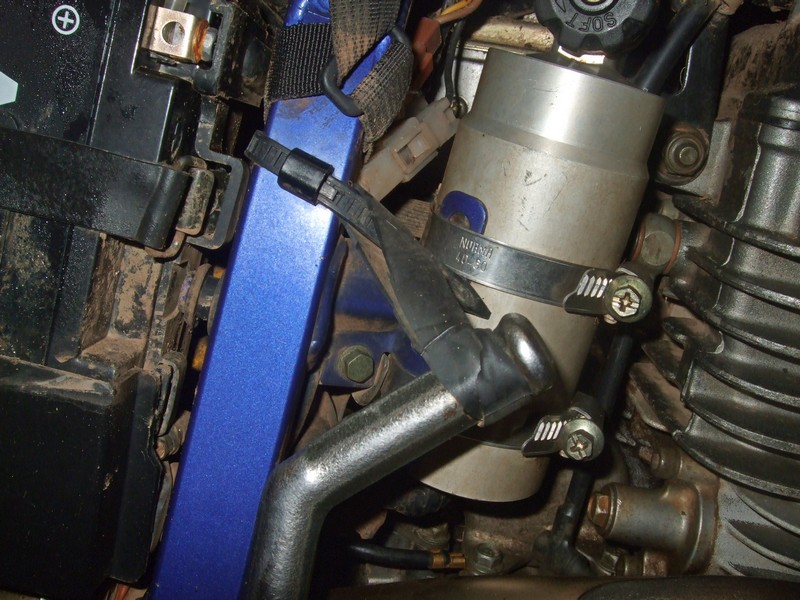
Grease them up and put the kickstart back together and you should notice an improvement. To help stop wear on the mechanism it is worth considering fastening back the top of the lever to stop it rattling.
I use a simple arrangement of a rubber band (cut from an old inner tube) anchored to the frame or top Jubilee clip on the shock reservoir by a cable or zip tie. Just wrap the band around the top of the kickstart until it's held in tight.
Brian Sussex
Compiled by Brian Sussex, Devon, UK
http://www.ttr250.com/
- all you ever wanted to know
about TTR250s
http://ttr250.activeboard.com/
- the forum for TTR250 owners
http://www.totallyttrs.com/
- everything you need (possibly!) for
your TTR250
http://www.totallywrs.com/
-
for all your WR250R and WR250X after-market parts and accessories
Reference within this site to any specific commercial or non-commercial product, process, or service by trade name, trademark, manufacturer, private individual or otherwise does not constitute or imply an endorsement, recommendation, or favour by Brian Sussex