DISCLAIMER: The modifications described in the following text are for educational purposes only. In no way do I recommend that you apply these modifications to your own motorcycle. If you do choose to go ahead and modify your motorcycle based on the information in this document you will accept all responsibility for your own actions. The author(s) of this document, and host(s) providing it for you, accept no responsibility whatsoever. If you are unqualified to make any of the changes described herein but are bent on doing the modification, seek out a knowledgeable friend or professional mechanic for assistance.
Fitting an on/off light switch on a Yamaha TTR250
It's a very simple operation. All you need is a light switch and soldering equipment.
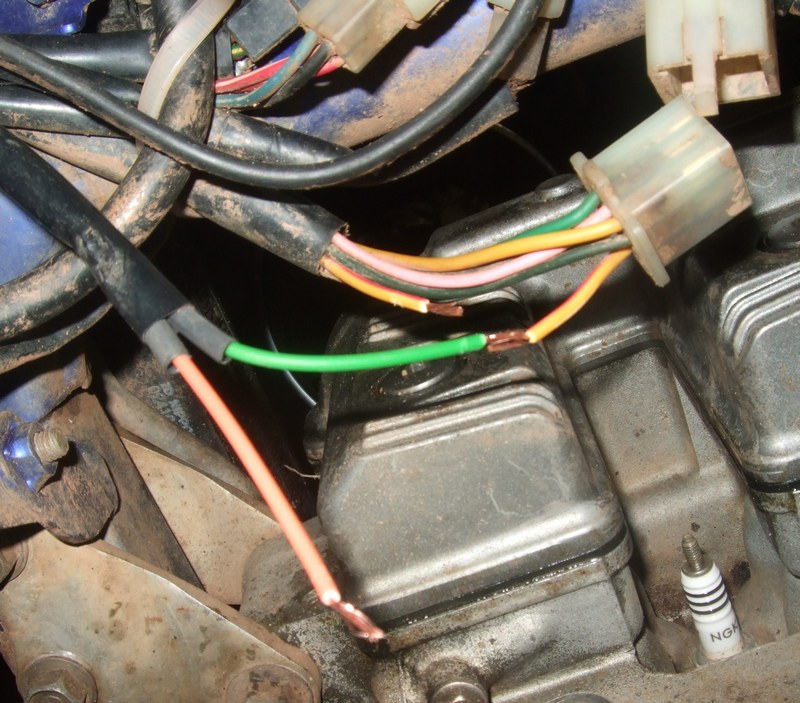
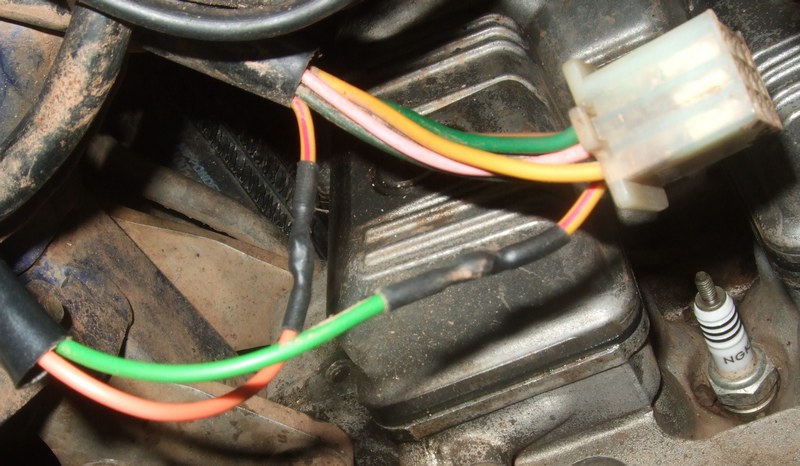
Firstly take the tank off and find the 9-pin connector that includes the headlight feed - a red/yellow wire. Using this wire allows both headlight beams to be switched off but leaves everything else, including the parking light, on.
It is important to check if your switch lead reaches to the 9-pin connector. The switch I used (Type B here) has long enough leads to reach which made the job easier. Otherwise you may have to extend the switch wires or cut into the light switch loom a little nearer the handlebars.
I run heated grips and a GPS so it is worthwhile being able to switch the headlight off. A few extra amps to the heated grips never goes amiss.
Slip some heat shrink tube over the switch wires (green and orange in the pics) well out of the way of where you are going to solder. The photo below shows the green switch wire loosely connected to the feed wire and ready to be soldered.
My soldering isn't brilliant but the joints were strong enough so that was the trickiest bit of the job done!
All back together and the switch did what it was supposed to do!

The switch was easy enough to fit and I like the "idiot" on/off markings
as I get easily confused 

Job done - about 30 minutes tops.
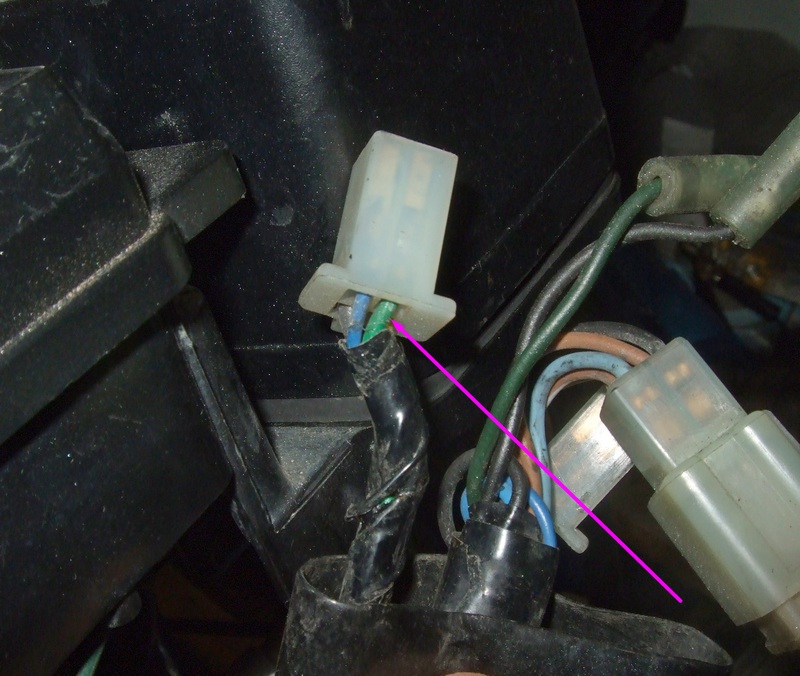
An alternative method is to cut the green wire in the loom just ahead of the 4-pin headlight connector as shown in the photo below. This would suit switch Type A here as it has a shorter lead.
To achieve the "headlight off" mode, run the bike in daylight on dip beam with the switch "off". Put the switch to "on" and you have both dip and main back in action for night-time riding. The advantage I see for this is that you don't even have to take the tank off!
Brian Sussex
Compiled by Brian Sussex, Devon, UK
http://www.totallyttrs.com/
- everything you need (possibly!) for
your TTR250
http://www.ttr250.com/
- all you ever wanted to know
about TTR250s
http://ttr250.activeboard.com/
- the forum for TTR250 owners
http://www.totallywrs.com/
-
for all your WR250R and WR250X after-market parts and accessories
Reference within this site to any specific commercial or non-commercial product, process, or service by trade name, trademark, manufacturer, private individual or otherwise does not constitute or imply an endorsement, recommendation, or favour by Brian Sussex or Totally TTRs