DISCLAIMER: The modifications described in the following text are for educational purposes only. In no way do I recommend that you apply these modifications to your own motorcycle. If you do choose to go ahead and modify your motorcycle based on the information in this document you will accept all responsibility for your own actions. The author(s) of this document, and host(s) providing it for you, accept no responsibility whatsoever. If you are unqualified to make any of the changes described herein but are bent on doing the modification, seek out a knowledgeable friend or professional mechanic for assistance.
Stripping down, checking and rebuilding a TTR250 carburettor
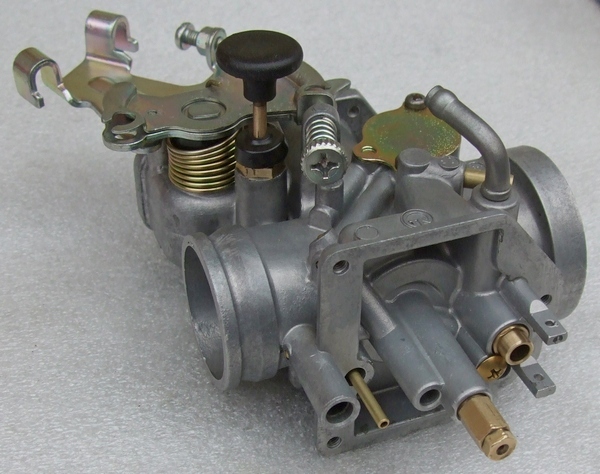
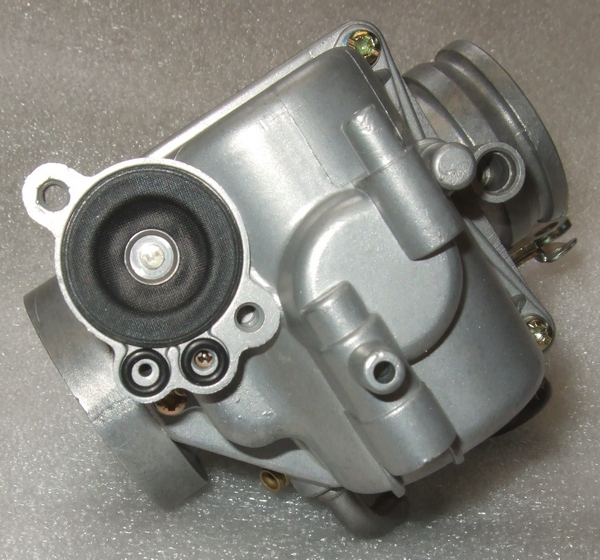
This step-by-step guide takes you through a complete rebuild of the TTR250's Teikei Y30P carburettor.
The same carb is used on all TTR250 models and the only differences are in the jets and nozzles which vary between years and the countries in which the TTR was sold.
There is advice on taking out the carb here. Also, there are a couple of tutorial videos showing removal and replacement of the carb here https://youtu.be/0k1EG1LuPBc and here https://youtu.be/Nlhl9aD9wHI
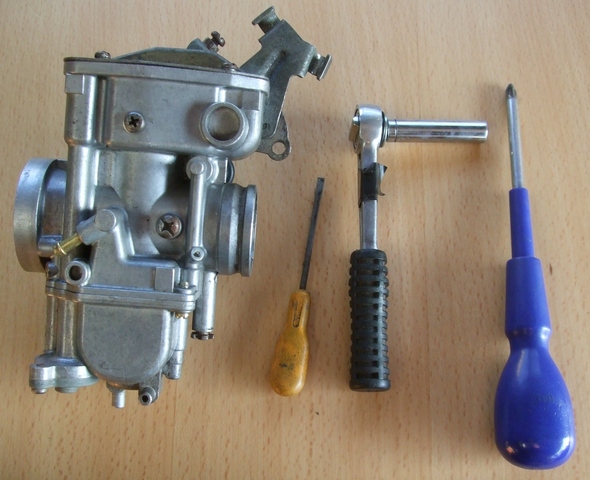
Tools needed: Small and medium plain and Phillips (preferably JIS - Japanese Industry Standard) screwdrivers, 6mm and 8mm spanners or sockets, and a 12mm open-ended spanner. Also an automatic centre punch if you intend to remove the float pin.
An aerosol can of carb cleaner would be handy to have but beware, carb cleaner, along with clutch and brake cleaning fluid, can damage most rubber, and some plastic components. Only use it on metal parts of the carb such as the jets.
Also, an airline or can of compressed air is really useful to blow through jets and air/fuel galleries in the carb body.
Part needed: Totally TTRs sell a comprehensive carb repair kit here which might be useful to have before you start work if you think replacement parts and gaskets will be needed. Totally TTRs also keep a wide range of individual new carb parts in stock - see here.
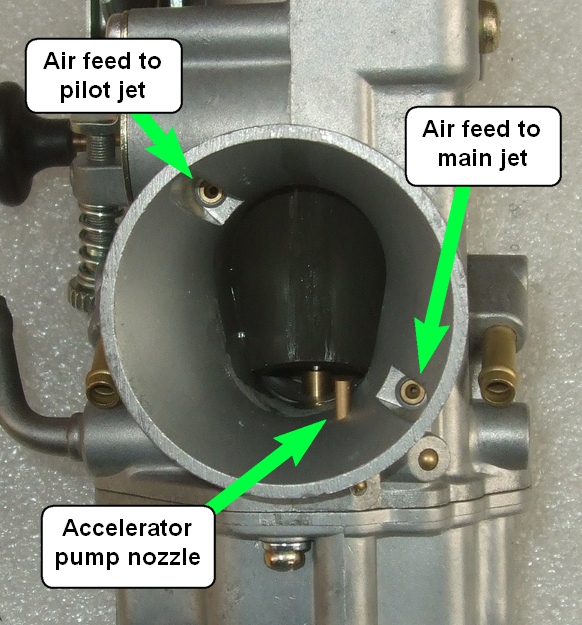
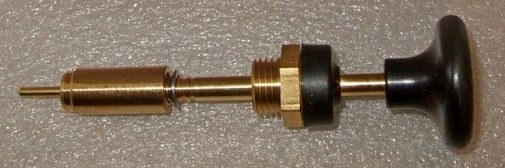
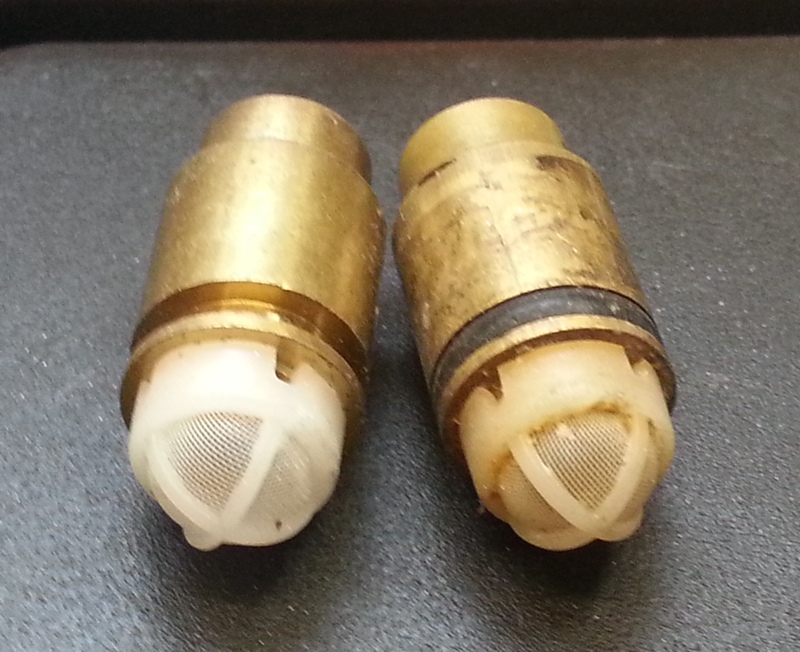
TIP: Check your accelerator pump is working properly BEFORE you strip the carb. The accelerator pump nozzle has a hole facing into the carb as shown in the photo below. To check its operation remove the carb with fuel in the float bowl and operate the throttle which should squirt a visible stream of fuel into the carb. If it doesn't then the diaphragm is suspect.
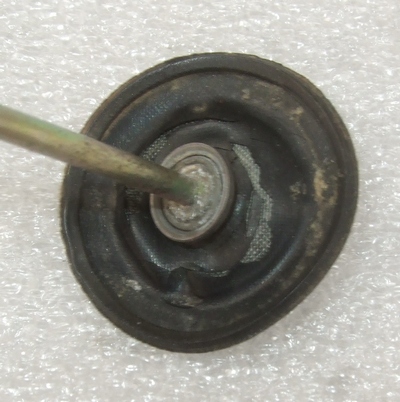
So, start off by removing the two screws and taking out the diaphragm to check it. If it needs replacement because the rubber part has hardened, perished or torn then the part number is 4GY-14940-00-00 or buy here. The photo below shows a badly perished diaphragm.
Remove the choke plunger using a 12mm open ended spanner. There is very little room to use the spanner and you might have to keep turning it over to get movement. I ground down an old 12mm open-ended spanner to make it easier and save damaging the choke.

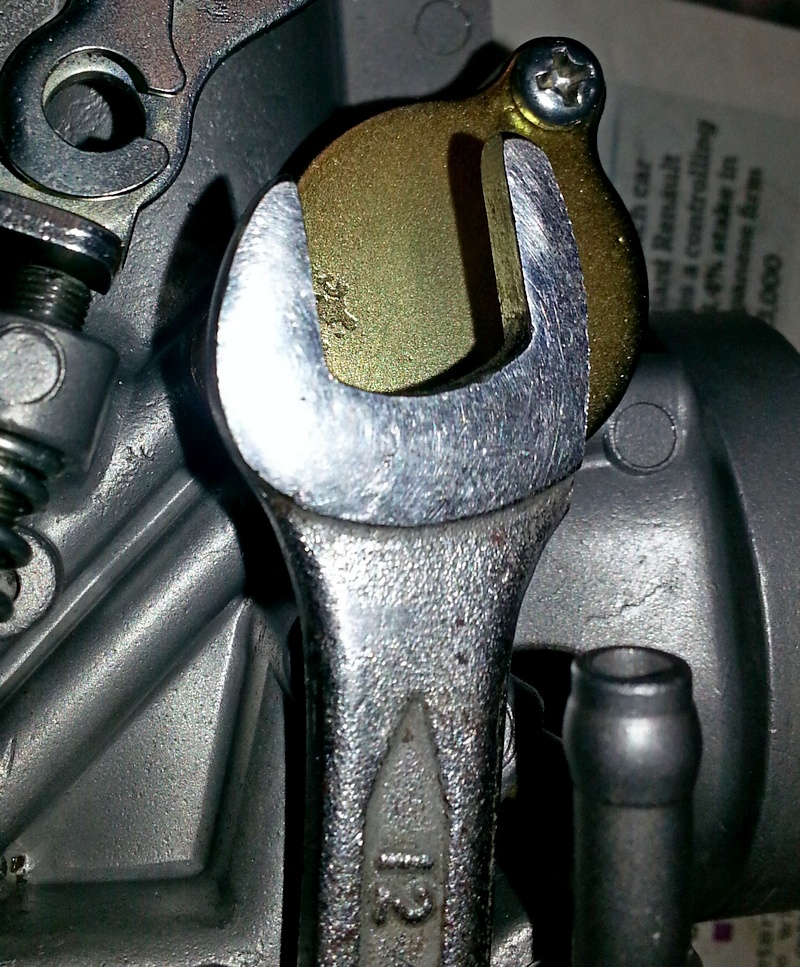
Check that the choke seal is not perished and the choke end rubber is in place. If you are unlucky enough to have a seized choke then a pictorial guide to freeing it off is here.
Remove the float bowl by removing the three retaining screws. You then have access to the float and jets.
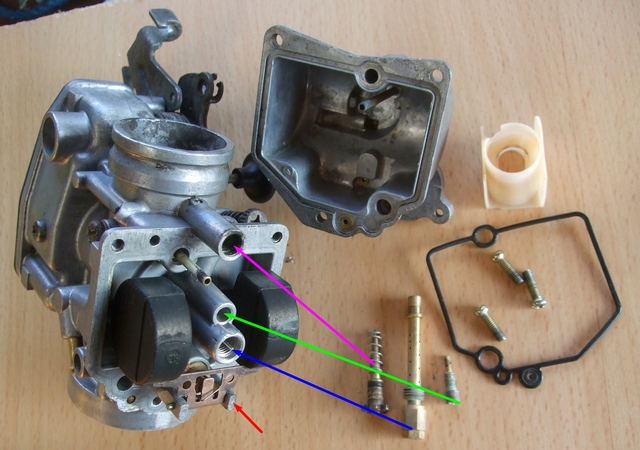
The photo below shows the carb stripped as far as you need to go if just cleaning jets. My advice is NOT to take the float assembly off without very good reason as you risk breaking the support post arrowed in red in the photo below. The retaining pin is usually very tight. If the worst happens and you need to repair a broken post, there is a step-by-step photo guide here.
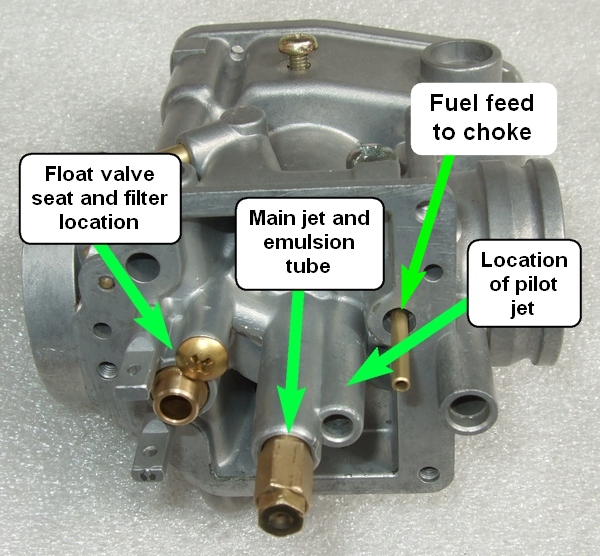
In the photo below, the pink arrow shows the location of the pilot screw, green arrow is pilot jet, blue arrow is main jet and its supporting emulsifier tube.
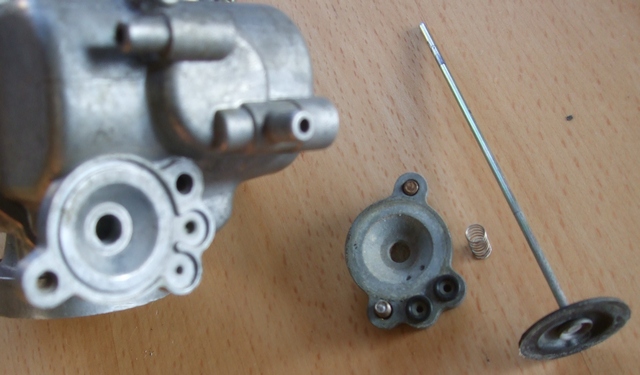
Take out the pilot screw and clean it up. If the O ring is perished/damaged/worn then replace it so that you don't get an unwanted air leak!
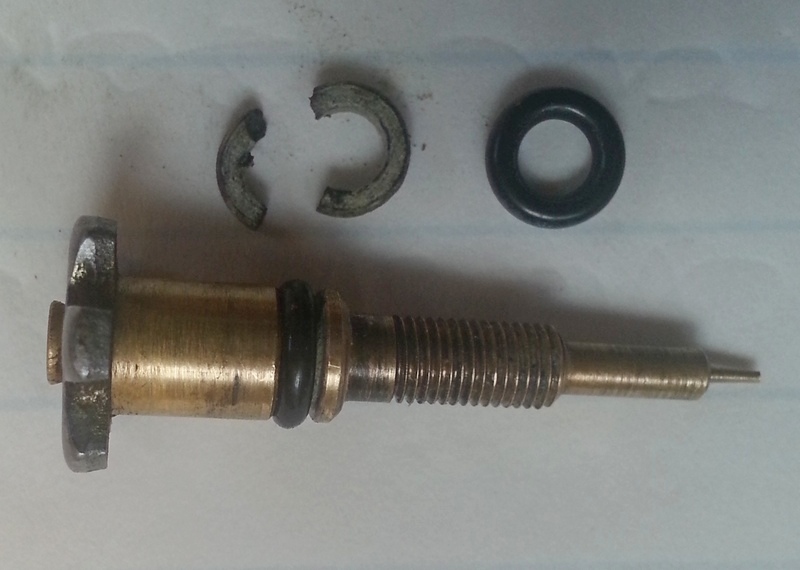
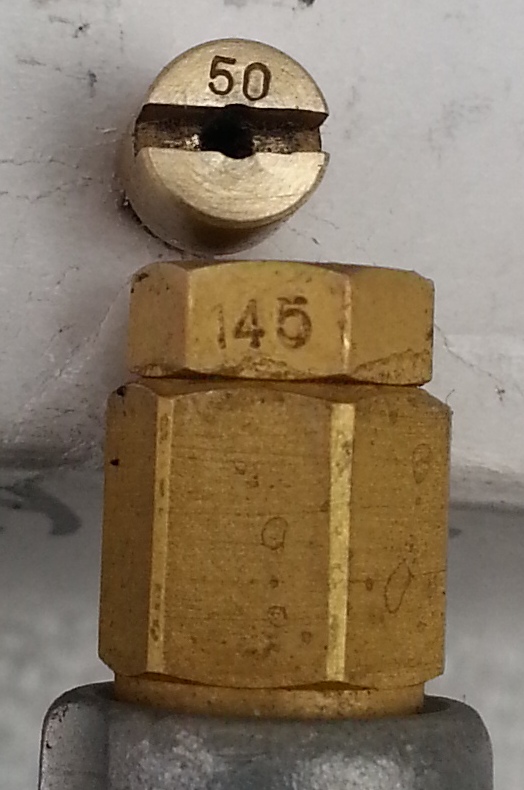
The pilot jet needs special attention as its hole is tiny and easily blocks. Remove it using a good fitting plain screwdriver as it can be in tight if the carb hasn't been touched for a while. Spray it through with carb cleaner but, most importantly, ream it with a piece of soft copper wire to make sure any old petrol deposit or debris is cleaned out. A blocked or partially blocked pilot jet is the biggest cause of poor slow running on a TTR250. Main and pilot jet size numbers are located as in the 2nd photo - pilot jet number on the top and main jet on the side of the jet.
The main jet can be removed with an 8mm spanner or socket. The emulsifier and main jet rarely suffer from blockages so just clean them with carb cleaner and blow them out with compressed air if available.
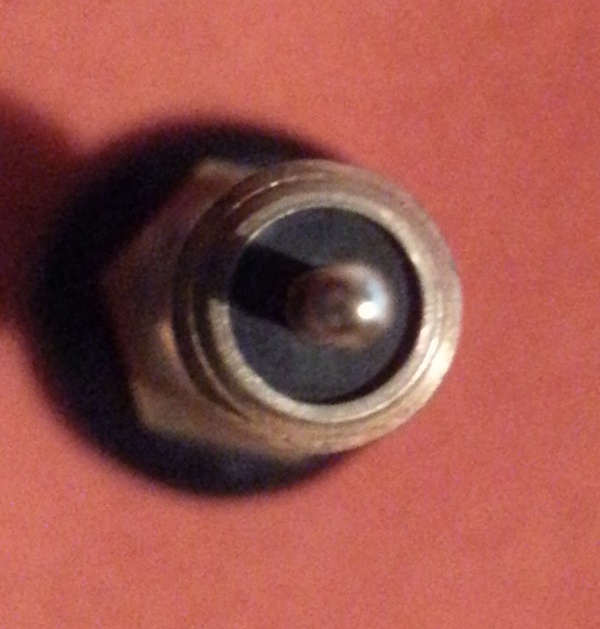
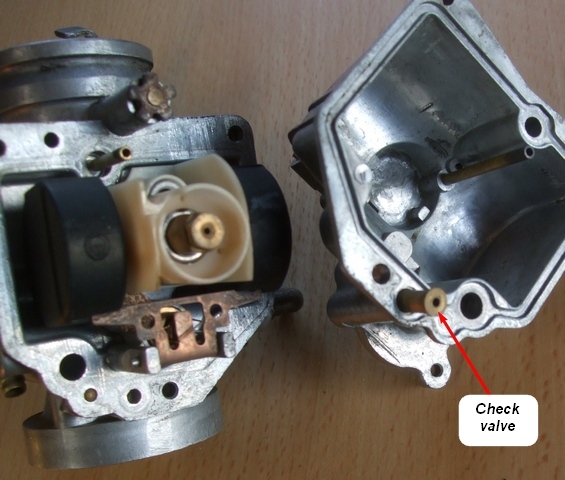
Make sure you don't lose the little brass check valve arrowed in red below. It has been known for them to fly across the garage (never to be seen again) when blowing out the float bowl with the airline.
If you remove the float, be careful as the retaining pin is usually very tight. It is worth investing in an automatic centre punch to do the job as they are not expensive - see a YouTube video showing how to do this here. If the worst happens there is a step-by-step photo guide here.
Once the float is removed, you have access to the float needle valve and housing.
The assembly needs to be removed to give access to the small white plastic filter above the needle housing which can now be cleaned.
TIP - the needle housing can be VERY difficult to remove. An alternative method of cleaning the filter is to hold the carb upside down, flush it with petrol or carb cleaner and blow out and rubbish with compressed air.
Check that the small brass jet that in the choke's fuel supply line is clear as
it is quite small and can easily be blocked by debris. This will cause poor cold
starting and idling.
Now that the bottom of the carb has been stripped, you can turn your attention to the top. Not necessary unless you want to do a thorough clean and inspection.
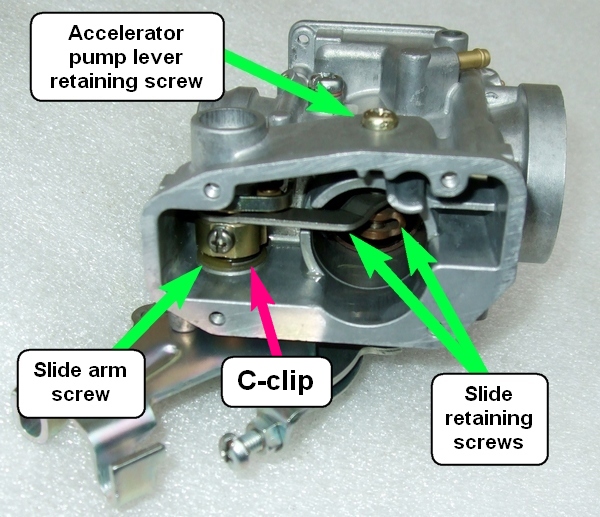
To remove the carb slide, first remove the four Philips screws that hold the top cover on and then the slide arm screw.
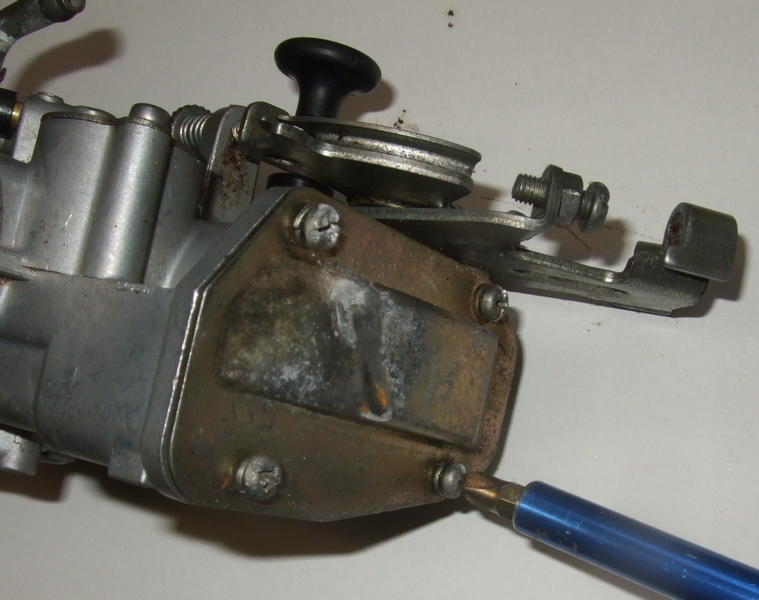
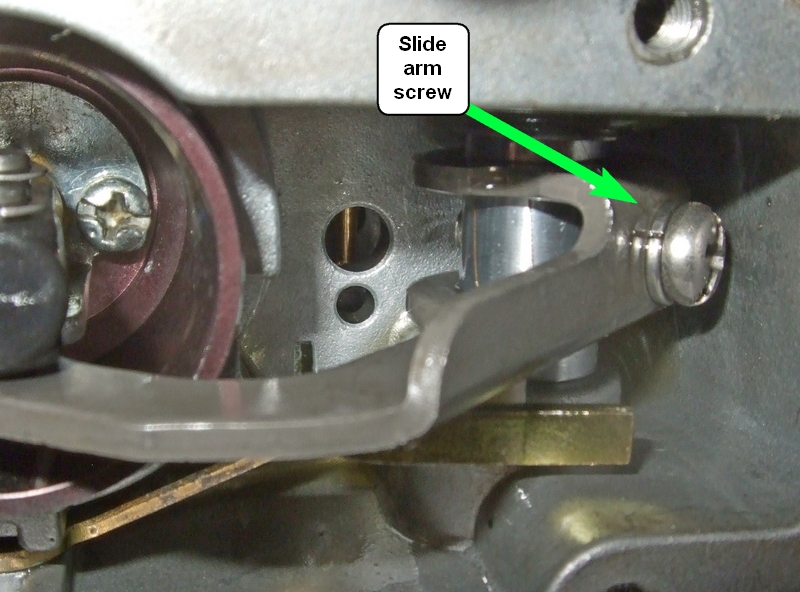
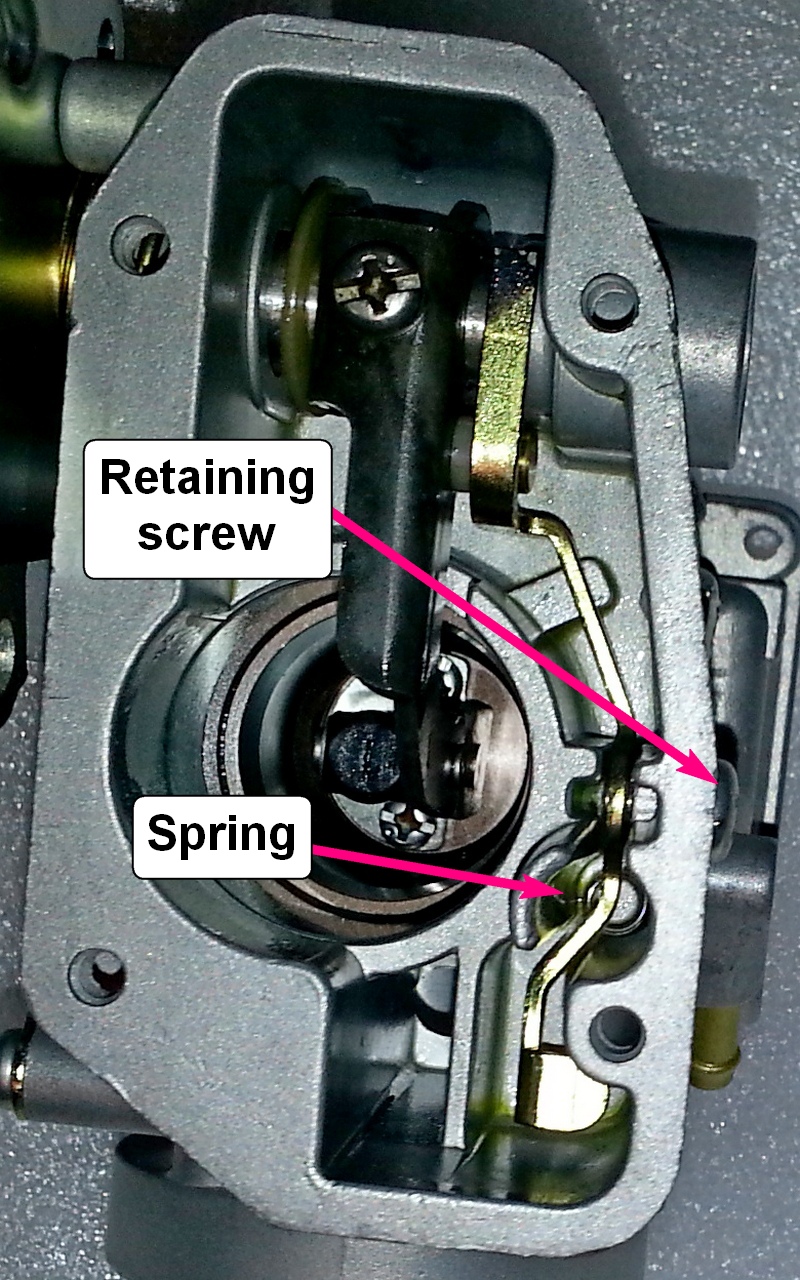
Remove the accelerator pump lever arm retaining screw from the side of the carb being careful not to lose the spring. Then lift the slide up and remove the slide retaining screws.
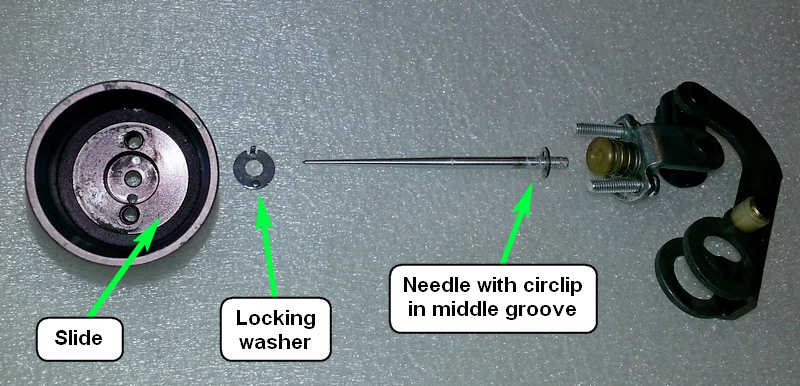
You now have access to un-clip the plastic needle holder and spring to remove the needle if you need to either replace it or adjust the clip position. The standard circlip position is in the middle of the five grooves. Moving the circlip up lowers the needle and leans the mixture - moving it down raises the needle and thus richens it.
Rebuilding the carb:
Firstly install the locking washer making sure the protruding tab goes into its hole in the slide. Having put the needle's circlip in the desired position, drop it through the slide and refit the arm using the two long Philips screws making sure that the cut-out in the slide faces the airbox.
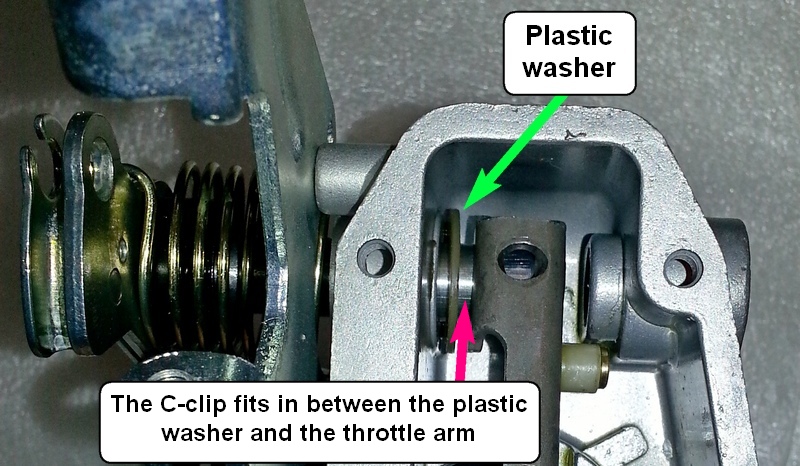
Install the throttle shaft, first use lithium grease (or copper slip) on the shaft. Make sure the plastic washer is installed between the carb body and the throttle shaft. Then install the spring to throttle lever (the 2nd photo shows where the spring hooks locate) and "pre-load" it by turn the throttle lever anti-clockwise just over a turn. This is a bit of a faff and easier to do than describe.
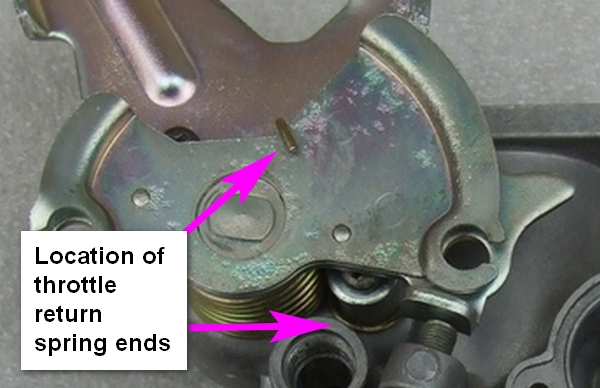
This is what the spring should look like when fitted correctly:
Check the carb top gasket is OK as you don't want it to leak air. If OK, replace the carb top with its four screws.
Next fit the choke plunger with the 12mm open ended spanner. There is very little room to use the spanner and you might have to keep turning it over to get movement and the plunger properly tightened up.
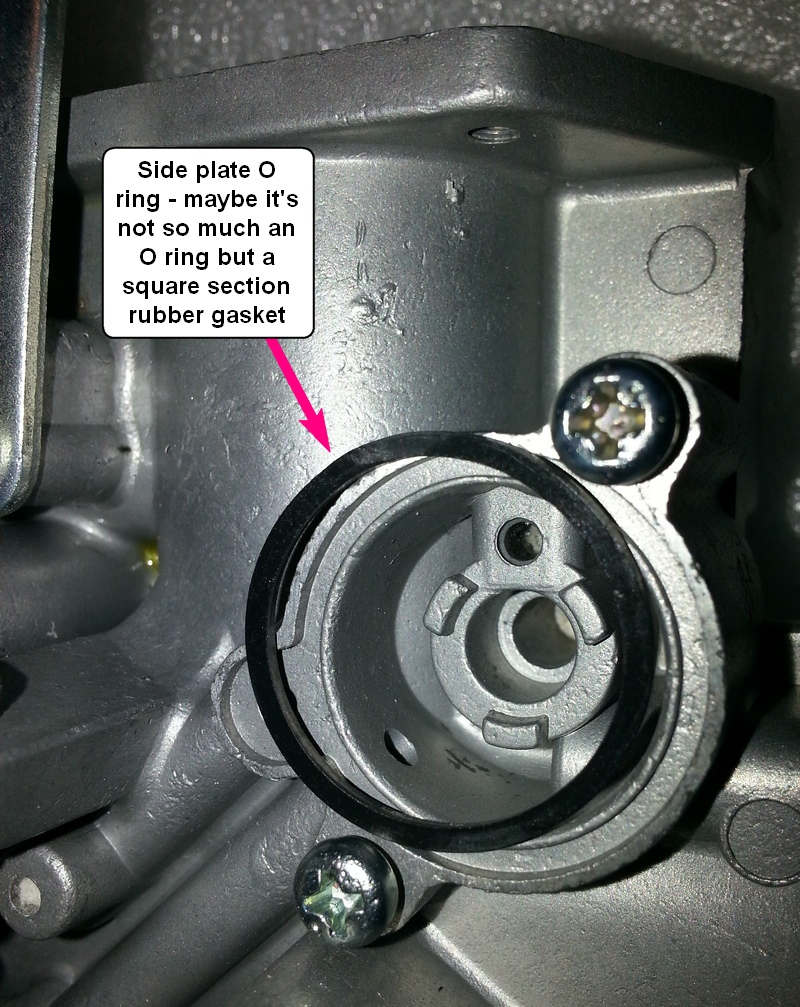
Remove the cover of the air flow chamber by undoing the two retaining screws. If the O ring is suspect then remove it with a toothpick or similar and replace it with a new one - see here. Smear the new O ring with rubber grease and then re-install the cover.
Turning to the bottom of the carb, install the nozzle (if it had been removed!), main and pilot jets. Also, the float valve seat, needle valve assembly and the float.
Many owners dress the holes in the float posts to make sure that the pin is a snug (but not loose or tight) fit.
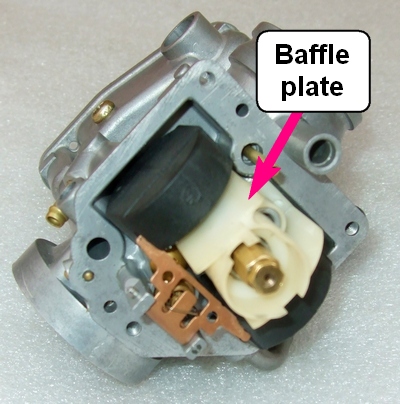
Later carbs had a "baffle plate", a white plastic cover that slips over the jets so fit this now if you have one. See photo below.
Next fit the small brass check valve after checking it is working. It is a one-way valve so the easiest check is to suck and blow on it. It should only let air through in one direction and not both! They can seize if the carb has been standing for a while in which case free it up with some carb cleaner and heavy duty sucking and blowing!
Before fitting the float bowl, check that you can unscrew the drain screw as these can seize in and are much easier to free up on the bench than in the bike. If the head of the screw is rounded out then there is a pictorial guide on removing it here.
Next install the float bowl gasket and then the bowl itself with its three screws.
Most carb leaks seem to occur because the float bowl gasket (part number 4GY-14384-00-00 - or buy here) as they get flattened over time and leak when re-used. I strongly advise putting a new one in if yours looks flat to save a lot of hassle!


Fit the pilot screw and spring by winding it fully in and then out about 2 turns before putting the carb back on the bike. The manual says 1.5 turns and this may suit your bike but I have found that the more open settings work better.
Dress the surface of diaphragm cover by rubbing it in a circular motion on some 240 grit wet & dry paper on a dead flat surface to give the best chance of getting a fuel-tight seal. Then refit the diaphragm, O rings, spring and cover plate with its two screws. Getting the spring in can be tricky. It needs to be balanced on top of the diaphragm with the float bowl upside down. Make sure the spring and O rings stay in place as you fit the cover.
It makes sense to replace the two little O rings (part number 5Y1-14397-00-00 or buy here) when re-assembling.
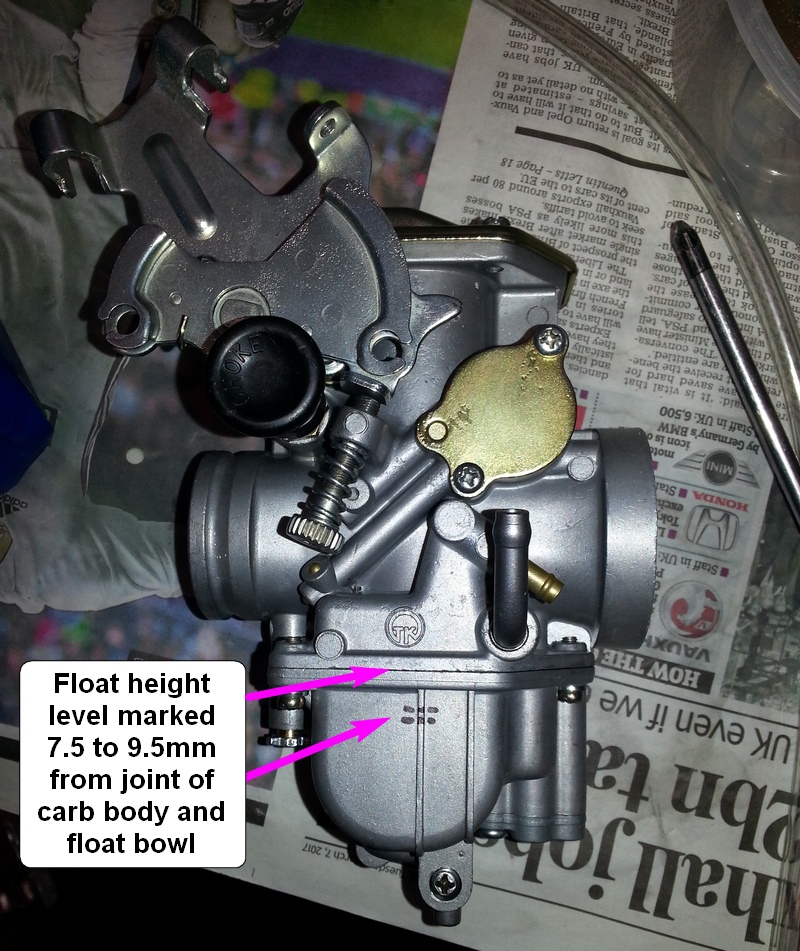
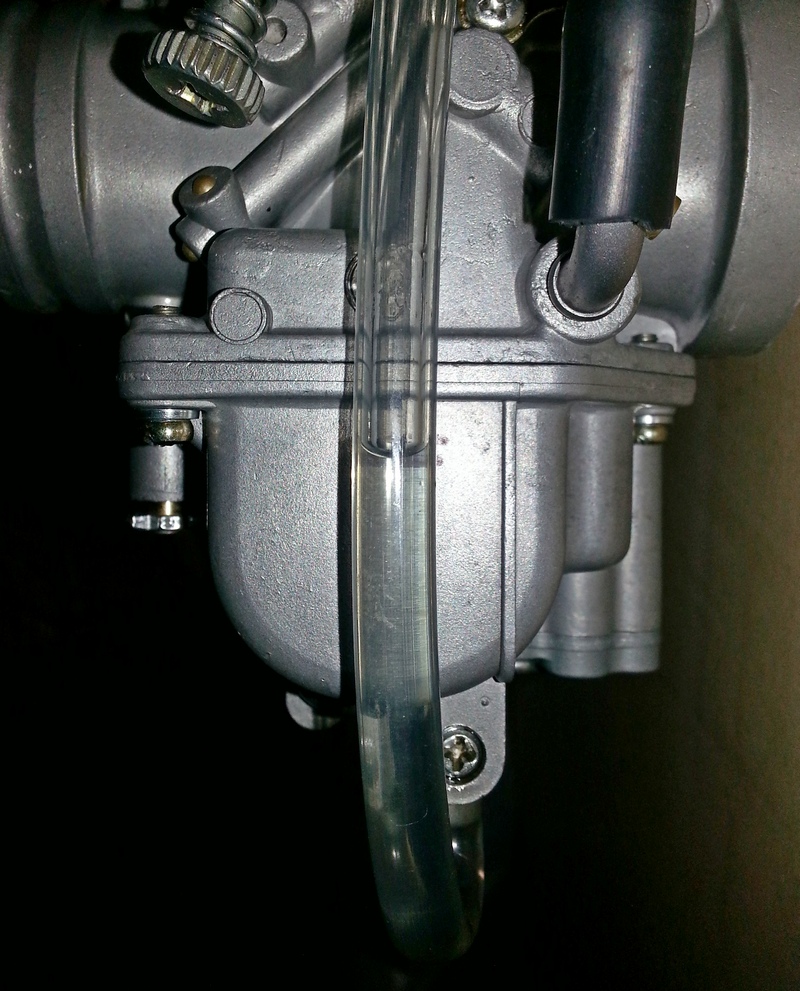
The rebuild is now complete but, if you have fitted a new float needle assembly you will need to check the float height is correct. I use a clear plastic tube attached to the float bowl drain and open the drain screw to check the level - see below:
The carb is now ready to be re-fitted.
Job done!
Brian Sussex
Compiled by Brian Sussex, Devon, UK
http://www.ttr250.com/
- all you ever wanted to know
about TTR250s
http://ttr250.activeboard.com/
- the forum for TTR250 owners
http://www.totallyttrs.com/
- everything you need (possibly!) for
your TTR250
http://www.totallywrs.com/
-
for all your WR250R and WR250X after-market parts and accessories
References within this site to any specific commercial or non-commercial product, process, or service by trade name, trademark, manufacturer, private individual or otherwise does not constitute or imply an endorsement, recommendation, or favour by me.